How to wallpaper a feature wall
How to wallpaper a feature wall, as a topic, is mainly about deciding on the best position to start papering. In other words, there is no need to alter any part of the hands-on ‘how-to’ wallpapering technique, but there is a need to be as accurate as possible when deciding on where to hang your first length. Okay, with the smallest patterns, you don’t need to worry too much, but with most papers you really need to concentrate on centralizing any design, and ensuring that when you get to the corners, you’ve chosen the best possible place for the corner to ‘cut’ down through the wallpaper. Below are the principles I follow when deciding how I’m going to set about wallpapering a feature wall.
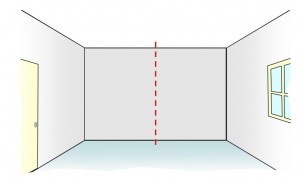 Finding the mid-point of your feature wall is essential. |
First of all, find out exactly where the mid-point of your feature wall lies. Everything else is dependent on this measurement, so take your time, and with the help of a spirit level and pencil, draw a light vertical line on the wall, from ceiling to floor. Here, I’ve used a red dotted line to represent the mid-point. |
How you use the mid-point will be determined by your particular wallpaper design. The two options below show the sort of thought processes that need to be involved. One option demonstrates using the mid-point line as a guide for positioning the edge of your first length, and the second option shows using your mid-point line as a centralizing guideline that runs through the main part of the pattern in your first length.
Feature Wall Option 1
|
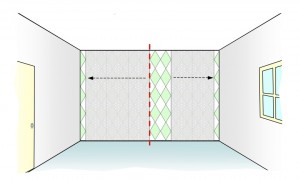 1a. Hanging the edge of the first length along the mid-point. |
|
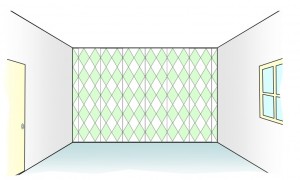 1b. Leaves equal sized strips for the corners. |
Feature Wall Option 2
|
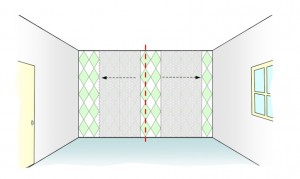 2a. Pattern in first length bisects the mid-point of the wall. |
|
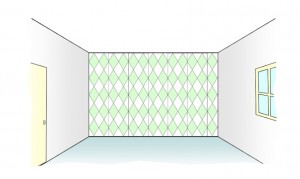 2b. Leaves different widths of strip in the corners, but creates a very well-balanced effect. |
Feature wall considerations
- To help your planning process, it’s always a good idea to cut a length of paper, with a reasonable sized overlap on each end, and temporarily fix it (dry) in what will be the position of your first length (use a couple of bits of tape – taking care not to damage the paper surface). You can then stand back, and decide on horizontal alignment of the pattern, and get a feel for where will be best for the corners to cut through the design. Planning is therefore a combination of accurate measurements with a tape measure, and visual judgements with a temporarily positioned length of wallpaper.
- For much more information about ‘how-to’ wallpapering technique, and the general points on where to start wallpapering in different situations, please check out some of my other wallpapering posts which are linked to in the ‘Related Posts’ section further down the page.

You show how to wallpaper a feature wall and how to paper a chimney breast that’s a central point on a wall, I have a gas fire that is “off centre” of the wall i want to paper, it has a marble surround but there is no chimney breast to paper around…..where do i start? My wallpaper has a large random pattern and i’m torn as to whether to place the 1st strip of paper in the middle of the fireplace and work outwards, or do a central line to the fireplace,place the 1st strip to the right of the line 2nd to the left and work from these… outwards, Whatever i do the 1st strip will never be central as the fireplace isn’t in the middle of the wall : (
Hi Kim,
There are always compromises in a situation like the one you have. I would be inclined to use the technique I describe above in ‘Feature wall considerations’ where you pin up some lengths dry to give you a good impression of what the finished article will look like. It’s difficult to give the best advice without seeing the paper/room, but if you have a large motif in the pattern, it’ll probably look best if centralised directly above the centre of the fireplace.
Remember – you’re centralising any pattern and not the wallpaper. Often the pattern is central to a the wallpaper length but not always. Notice above in Feature Wall Option 2 that to get the triangular pattern central, the first length hung is not in fact centrally positioned on the wall.
Hope this helps,
Julian
Hi Julian I am so pleased to read your comment about centralising the pattern not the paper as some paper’s are printed off centre and this changes your starting point . As this is not known by most people even decorators. I have been in the trade for 50 years and teaching painting and decorating to . I have all ways told the students you when papering a feature wall. Centre the wall ,Centre the piece or Centre the pattern and this changes on the size of wall ,size of pattern and how it has been printed. You have made my day Thank you.
Hi Chris,
Glad you agree with the technique. I often think that some wallpaper manufacturers could be a little more helpful in supplying instructions for centring paper designs, especially with tricky offset patterns.
Best,
Julian