Wallpapering around a window
Wallpapering around a window is a task that may be achieved in different ways, but the method I am showing here I’ve found to provide by far the best finish. There are no overlaps using this technique, resulting in a seamless finish, and as long as you are methodical in your approach, and trim accurately, it is no more difficult than any other wallpapering technique.
For ease of explanation, the labels (A-R) on the illustrations below do not refer to single lengths of paper but rather to the particular area being described. Remember to give yourself plenty of time when wallpapering around a window, don’t rush, and wipe away excess paste as soon as possible, after each length has been hung.
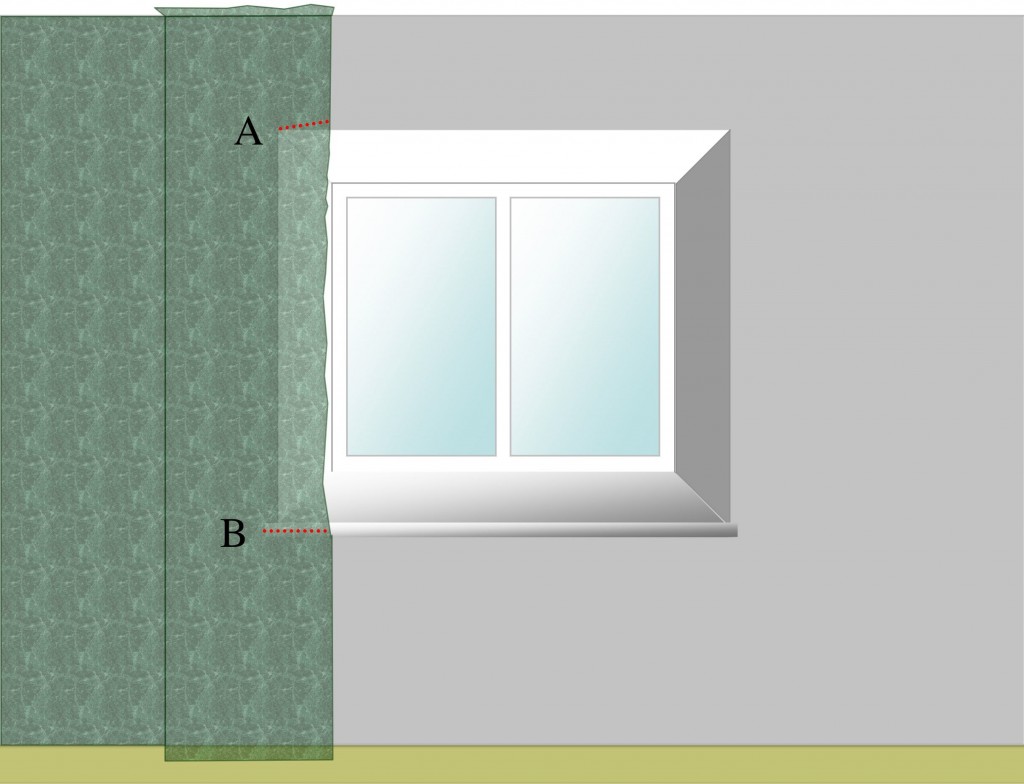
1. When you reach a window, begin by positioning the paper in the normal way, but allow the length to hang across the recess created by the window reveal. Cut from the right edge, slightly above the top of the recess, back, exactly to the top corner (A). The second cut (B) needs to be made from the right edge, back, exactly to the point where the sill creates a junction with the wall. This cut must be horizontal and effectively bisect the edge of the window sill.
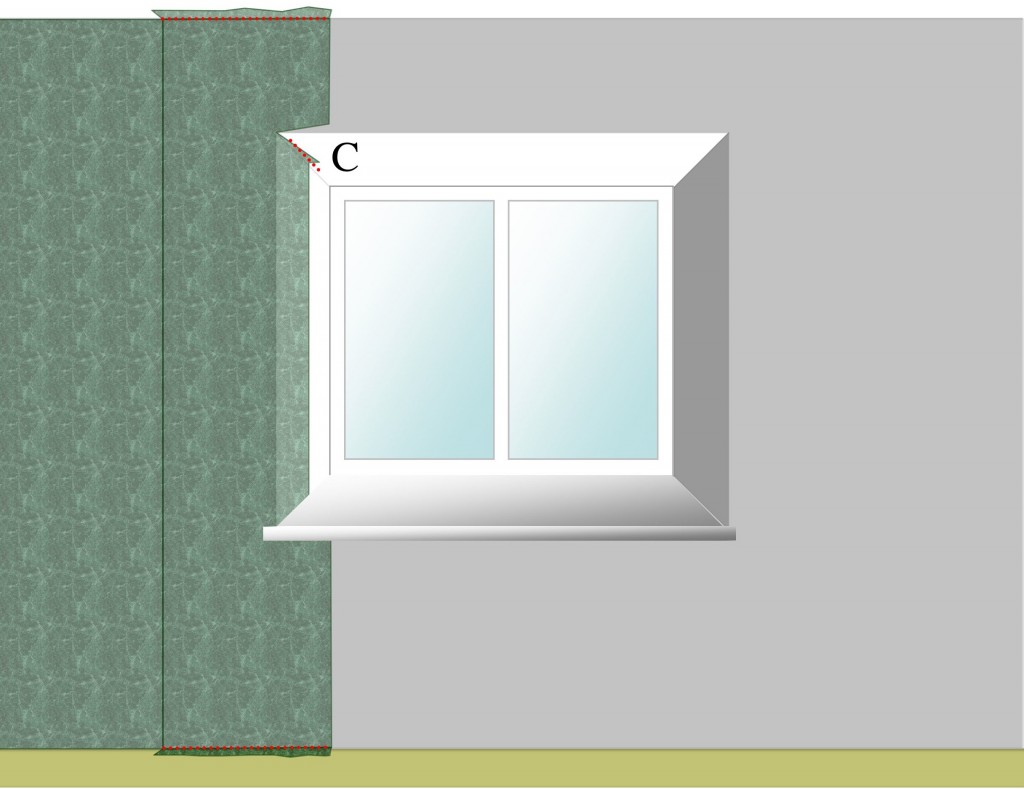
2. Making a number of small cuts with a Stanley knife, gradually trim around the sill edge, so that you may then bend the central section of the length around into the recess. Trim the top and bottom of the length as normal. However, if the paper simply won’t ‘bend’ successfully – see my note in ‘Things to consider’ at the bottom of this post. One final thing to notice is that because of the slightly angled cut we made (A), this provides an excess of paper (C) to slightly overlap onto the underside of the reveal. If you didn’t do the angled cut, you tend to find you leave an unsightly gap along this junction. Depending on the size of the overlap you have created (C), trim back to a few millimetres from the edge (as shown by the dotted red line).
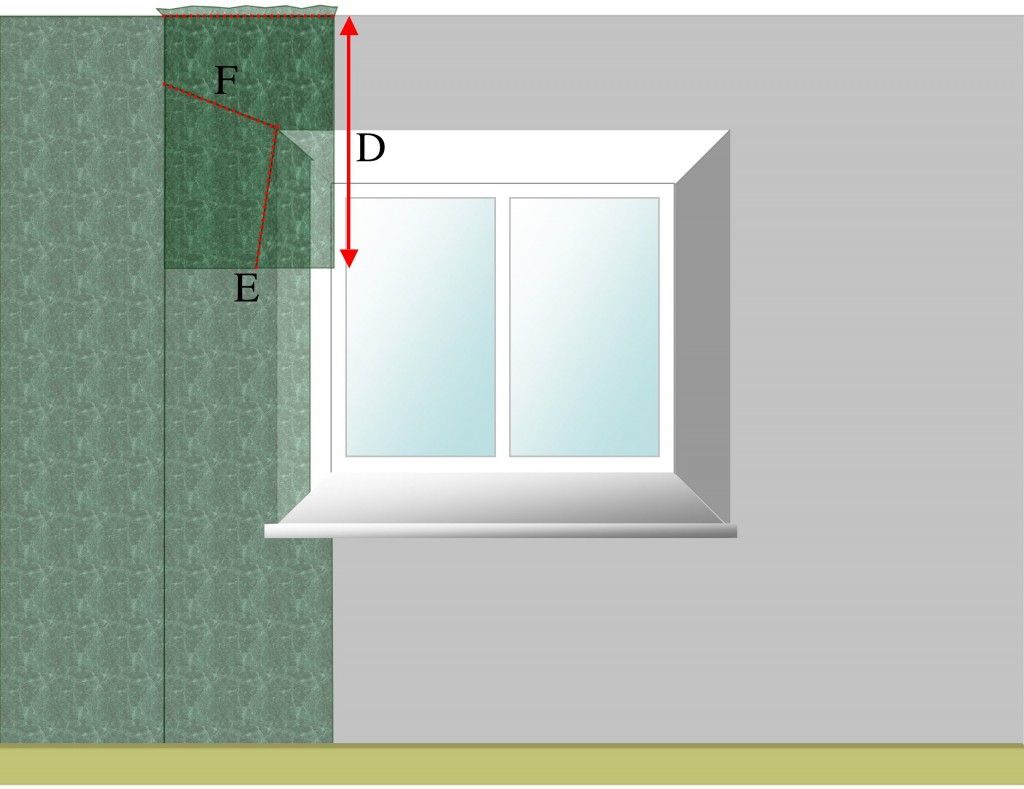
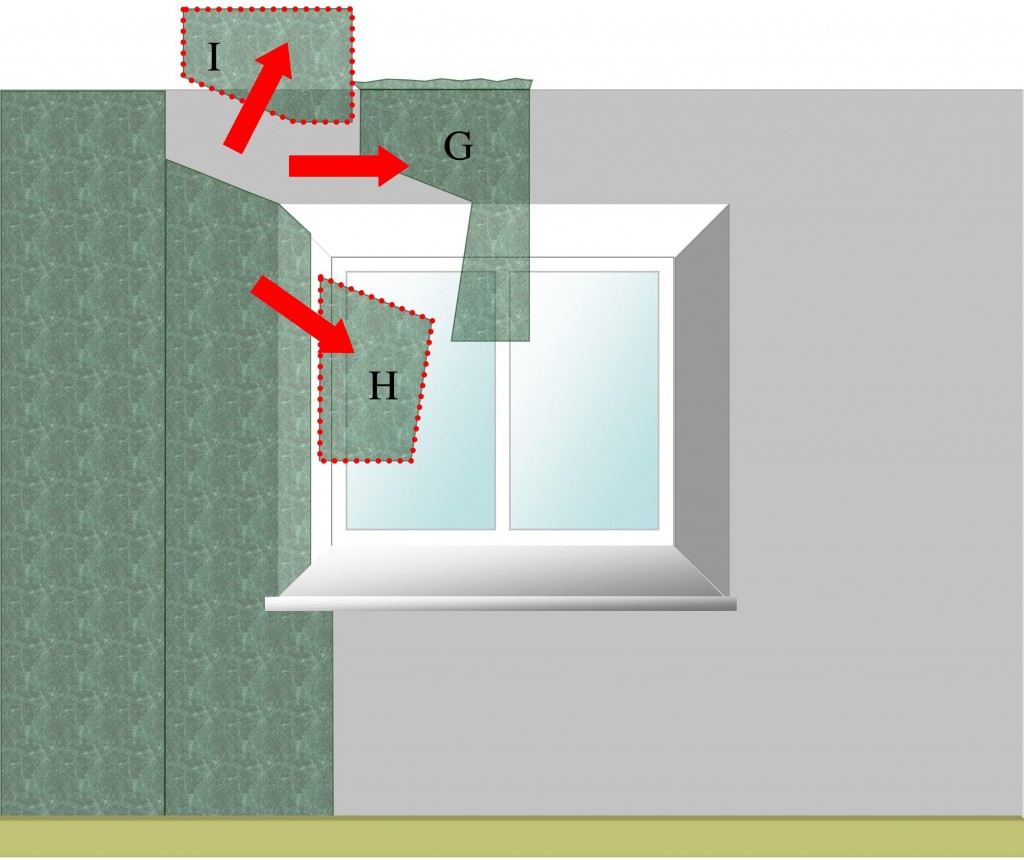
3. Cut a shorter length, that is long enough (D) to go from the ceiling to the top of the recess, into the reveal and to the window edge (plus enough for trimming). You then position it over the top of the previous length, matching the pattern as normal. Use scissors to cut (E) at a slight angle from the bottom of the length, exactly to the top corner of the recess. You now need to take a straight edge (such as a steel ruler) and a Stanley knife, and cut precisely along the line (F), down through both lengths of paper from the left edge to the top corner of the reveal as shown. Always use a new blade for this cut.
4. Carefully, move the small length to one side (G). Remove, and discard, the offcuts (H) and (I). As always, you need to take care with paste on the surface of the wallpaper, so make sure you remove all the excess from paper surfaces with a clean damp sponge.
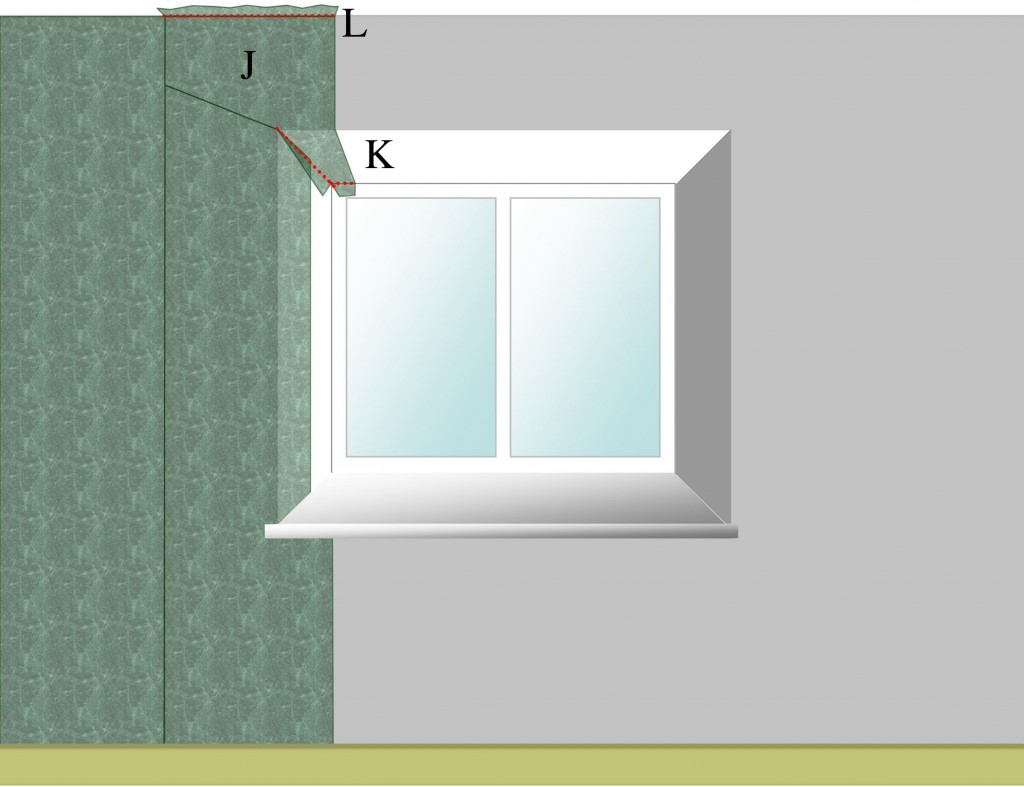
5. All you need do now, is move the small length back into place (J), taking great care to make your perfect spliced join back with the initial length to the left of the window. You then bend the lower section into the recess (K) and trim excess paper as required. You may now trim excess at the ceiling level as well (L).
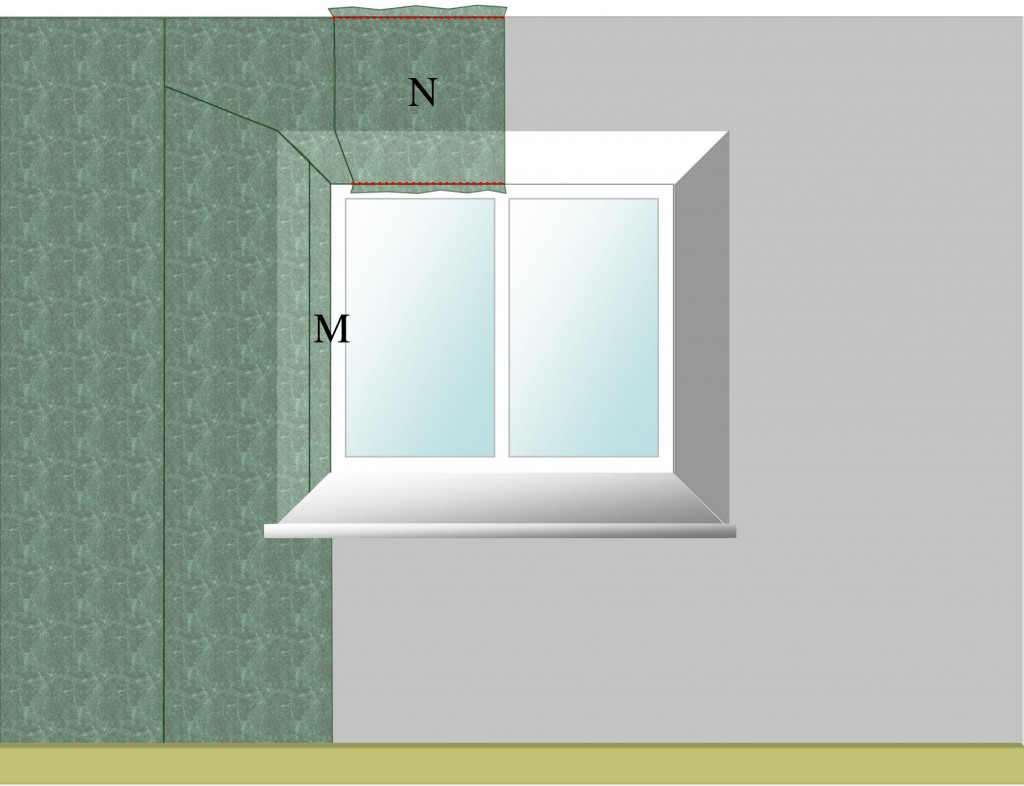
6. For windows with deep recesses, as in this example, you may well need a further section of wallpaper to fill in up to the window frame (M). Now continue to wallpaper above, and into the recess with another short length (N).
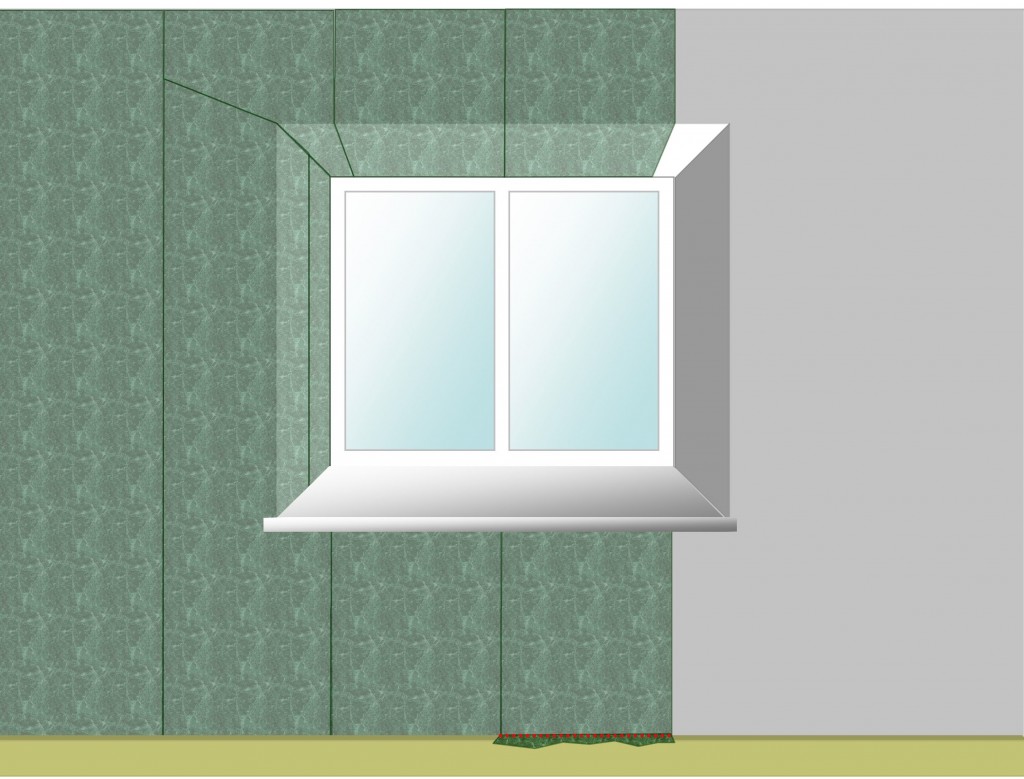
7. Continue above and below the window until you reach the other side of the window reveal. Keep hanging, trimming, and cleaning in the usual way.
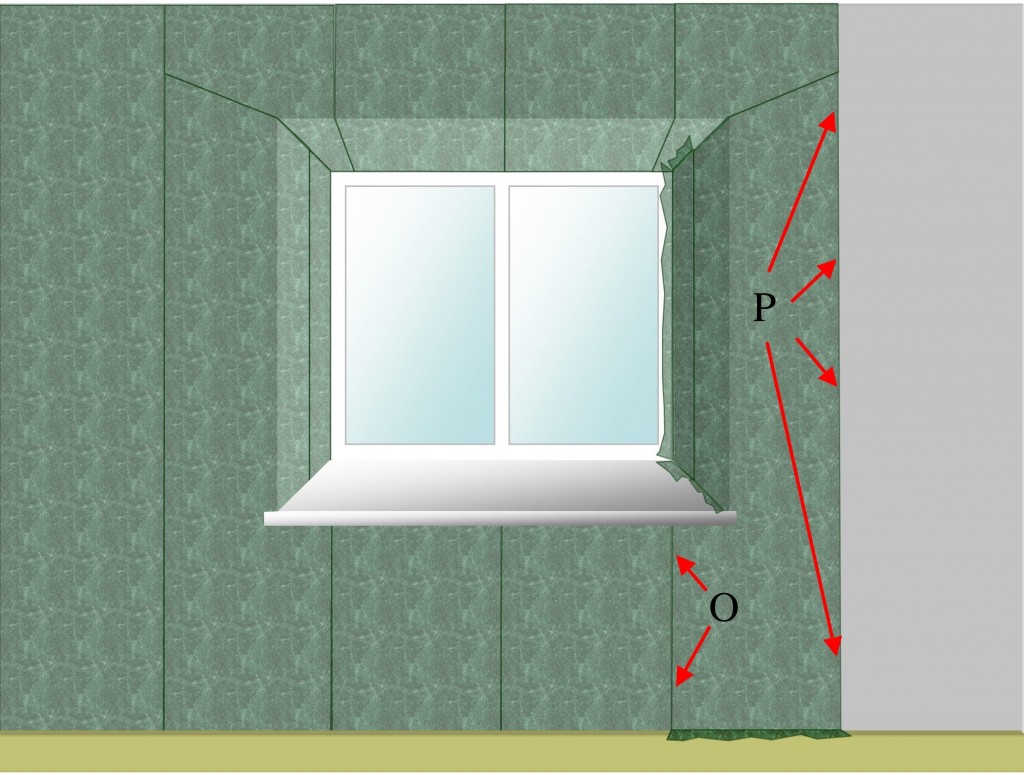
8. You then simply follow the same technique for this edge/reveal of the window that you did in the first instance. However, it can get slightly tricky here as getting all the edges to pattern match (O) as well as be precisely vertical (P) can take a bit of doing. On the vertical issue, make sure you have your spirit level on hand to ensure that the right hand edge of your last length is precisely vertical to continue wallpapering around the room. Also, until you have these three or four lengths precisely positioned, do not trim edges. As shown in the illustration leave excess paper until all is pattern-matched and vertical.
9. Once past the window, you then simply carry on around the room.
Tips for wallpapering around a window
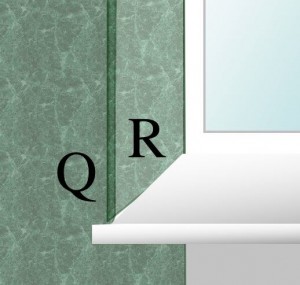 I mentioned above in, step 2, that if you cannot bend lengths around the recess or reveal corner, another option is required. Well, the traditional method is to trim the length you bend round the reveal (Q), back close to the reveal corner (1cm from the edge), and then paste and hang a single new piece of wallpaper to cover the reveal (R). You do get a neat finish, but you will now have an overlap down the reveal corner.
- My preferred solution would therefore be to adapt the technique that you use for standard floor to ceiling external corners. Effectively you splice a join, and use the same principle as demonstrated in steps 3 and 4 above. For a longer explanation, take a look at steps 25-27 in my ‘Wallpapering a room’ guide.
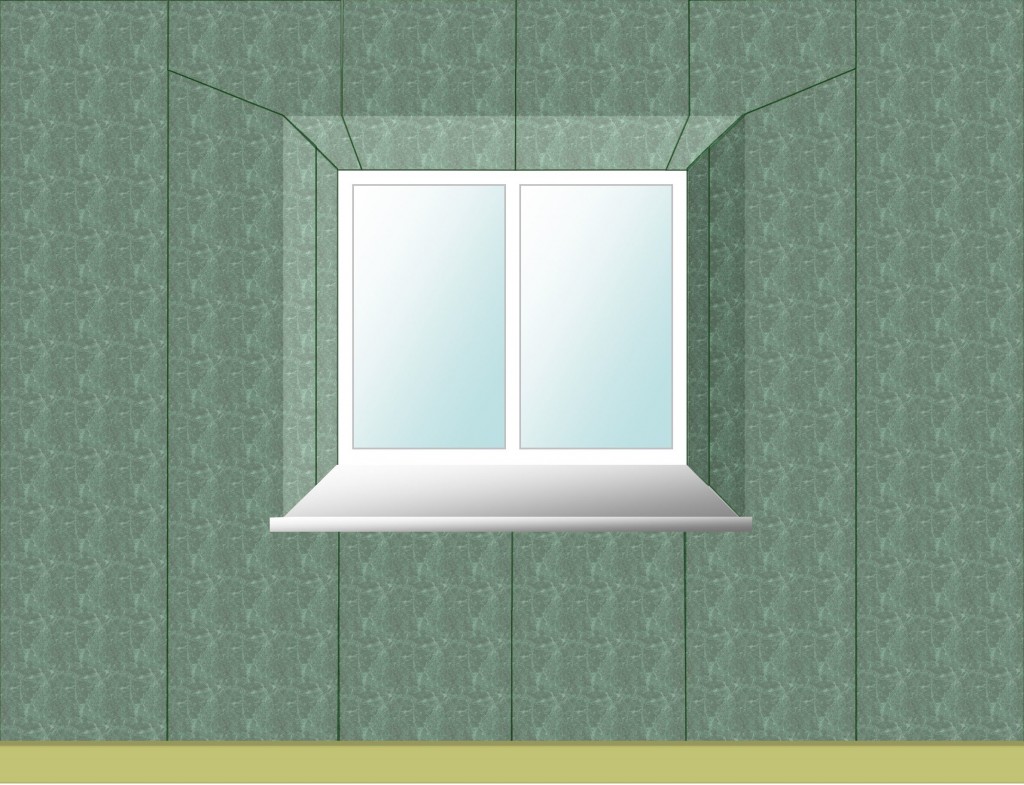
- One final thought relates to the two diagonal spliced joins on either side of the recess. The length of these joins will depend on how you have measured up your room, and therefore how close to the window you are, when you need to start bending into the recess. Although my illustration shows balanced/equal joins on each side, this is not essential, as if you’ve done a good job they are invisible joins anyway. Also, if you don’t get a perfect join, remember that this is normally the area where you will position curtain brackets/rails etc., and therefore the join is likely to be totally or partially obscured.

Ta for the instruction for wallpapering around the window, turned out very good and it was easy to follow
Hi Andy,
Glad I could help!
Best,
Julian