Hanging a wallpaper border
Hanging a wallpaper border is a simple way of adding further decoration to painted walls, or over the top of wallpaper to add extra pattern and interest. Hanging a border is straightforward, but you do need to know what adhesive, if any, is required to hang the border. There are three main options – Firstly there are those borders that require border adhesive, that is pasted onto the back of the border with a brush or roller before hanging. Secondly, there are pre-pasted borders that have the paste already impregnated in the paper, which is then reactivated by soaking the border in water. Thirdly there are self adhesive borders, that are already sticky-backed and applied direct with no further adhesive.
Personally, I strongly advise against the self-adhesive options as they give you no opportunity to manoeuvre the border once on the wall surface. Now, for me, some manoeuvrability is essential with all wallpapers and borders alike, or you can get into some real problems – so self-adhesive is a great idea in theory – but a total nightmare in practice. The pre-pasted are fine, but in some cases I would still paste them to ensure the best adhesion. Therefore my favourites would be the traditional paste-the-back options, which I would always hang using the specific manufacturer’s recommendation for border adhesive.
Positioning a wallpaper border
There are basically three options for the height at which you hang a wallpaper border. In terms of hanging technique, things stay much the same, but in terms of aesthetics, you will get very different effects.
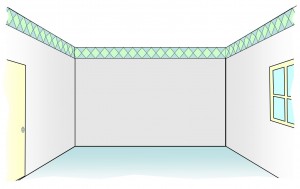 Fig. 1. Border hung at wall/ceiling junction. |
If you decide to go for the top of the wall option, bear in mind that it is highly unlikely that the wall/ceiling junction is a precisely level line.Therefore, if you are painting the ceiling, cut in with the paint colour slightly down onto the wall surface, otherwise you may find that once your border is hung, you may see bands of wall colour (or pattern) above the border, which will accentuate any undulations along the wall ceiling junction. |
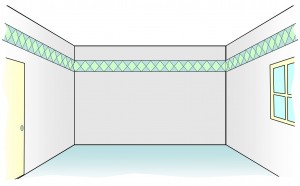 Fig. 2. Border hung at picture rail height. |
Hanging a border at picture rail height is another decorative option but is only really advisable in rooms with high ceilings.Further effect can be gained by painting the wall area above the border the same colour as the ceiling. |
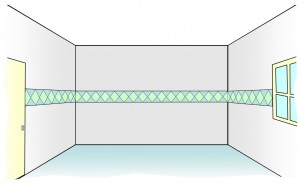 Fig. 3. Border hung at dado rail height. |
The third option is dado rail height.The border therefore divides the same wall colour or many people use different paint colours above and below.A further option is to have different wallpaper patterns above and below the border. |
Whichever height you are hanging the border, never try to bend a length around a corner, as firstly it is highly unlikely that you will be able to keep it level, and secondly it will nearly always pull away from the wall in the corner once the adhesive dries (if not immediately, pretty quickly down the line…). Therefore the sequence below deals with the best way of getting around an internal corner when hanging a wallpaper border, and continuing around the room to complete the job.
| 1. Use a pencil to draw a guideline around the room at your chosen height. The line should be a guide for the bottom edge of the border (you effectively cover the line with the bottom millimetre of the border when you hang it).The easiest way to draw the line is literally use a spirit level as both your guide, and straight edge. | 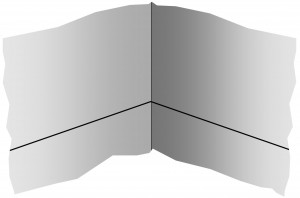 |
| 2. Your first length should be applied, using the pencil line as your guide. At the corner, allow the border to overlap slightly (about 5mm) around the corner on to the adjacent wall. | 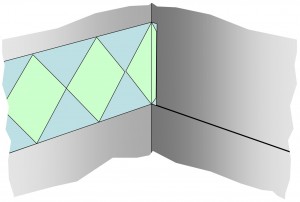 |
| 3. Allow your next length to overlap onto the previous one. Even though there is an overlap, match the pattern precisely with the previous length. | 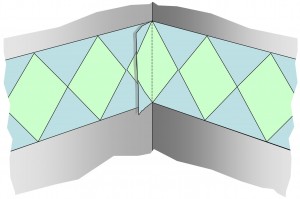 |
| 4. Once the pattern is matched precisely, draw a light pencil line down the junction (shown as the red dotted line in the diagram). You then pull this length back and use a pair of wallpaper shears to cut exactly along the light pencil guideline. | 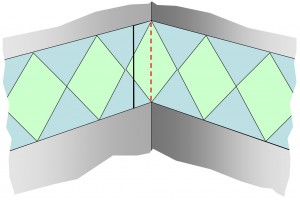 |
| 5. Smooth the trimmed border back in place to provide a perfect overlapped join. Continue around the room, following the same technique for every internal corner. | 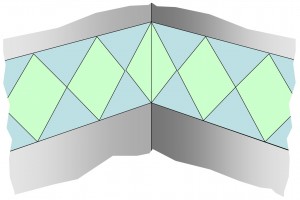 |
Wallpaper border tips
- The above technique is only for internal corners – external corners will be covered in a future post/guide.
- Wallpaper borders are essentially wallpaper, and so be aware of all the standard wallpapering rules such as keeping surfaces clean, and soaking (border) lengths for the appropriate time before hanging – more about these sort of rules in my ‘Wallpapering a room’ guide.
- If you are applying a border over wallpaper, you may not need to draw a pencil guideline as you can simply follow a repeating point on the wallpaper as it will be at the same height from length to length (this does however assume that the wallpaper has been hung perfectly vertical!).
- In Fig.1., I mentioned about painting slightly down from the ceiling as a way of dealing with uneven ceiling/wall junctions. You have to be slightly careful here, as if the border is made from particularly thin paper, any paint colour can “show” through the border. Therefore if you cut in to half way down the height of the border, you may get a shadowed effect because the background behind the border is made up of two colours (wall and ceiling). Generally, this is not a problem, but if you have a thin, flimsy, light border and deeply contrasting ceiling and wall colours, you may need to be more accurate with your cutting in down the wall.
