Fitting a kitchen worktop
Shown below is a technique that may be used for fitting laminated or wooden kitchen worktops, as well as how to join a worktop using a joining strip. The alternative of making a flush joint without a joining strip is really a job for the professionals as the best seamless joins require a router, cutting jig, worktop connecting bolts, and lots of practise! Some composite kitchen worktops may also be fitted in the same way as laminates and wood, except that the manufacturer often stipulates strict guidelines about how the worktop should be cut and treated – again a router is normally required and special jointing compounds are used for finishing the joints. Plan carefully when fitting a kitchen worktop in order to make the best use of factory edges. These will always be perfectly square cuts, so use these where possible when making joins in corners.
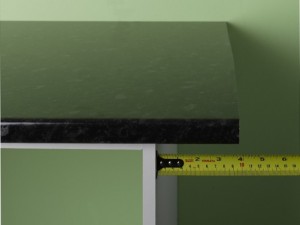 |
1. When positioning a worktop, where the surface finishes at the end of a base unit, allow a 1-2cm overhang in relation to the side panel below. |
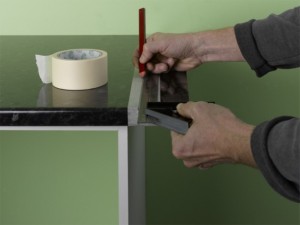 |
2. If you have to trim an end, for laminated worktops, stick masking tape along the cutting line to help prevent splintering of the cut edge. |
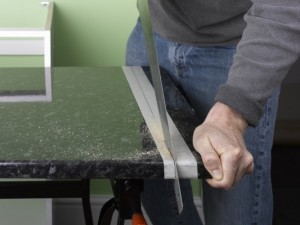 |
3. Unless the manufacturer specifies, laminate and wooden worktops may be cut to length using a power or handsaw. Cut through the pencil line on the masking tape. |
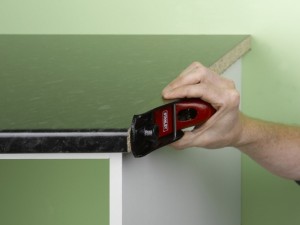 |
4. The cut surface will be quite rough and so use a block plane for removing any rough edges along the cut. Run gently along the edge until smooth. |
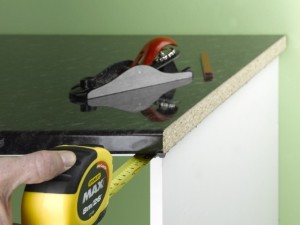 |
5. Position the trimmed worktop so that it touches the rear wall. At the front of the worktop, the ideal overhang is 4cm proud of the units. |
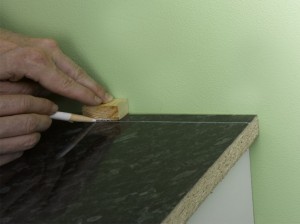 |
6. For example with a 5cm overhang, trim off 1cm (5cm less 4cm – the required overhang). You will need a 1cm scribing block to trace a guideline. A jigsaw is the ideal tool for trimming off this excess. |
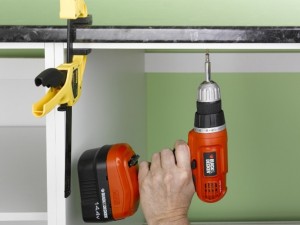 |
7. Position the worktop and clamp it in place. Fix it to the units from the underside. Many manufacturers will supply fixing brackets or blocks. |
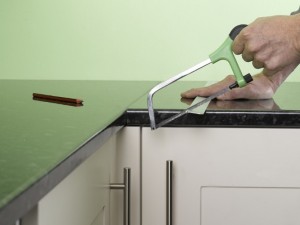 |
8. If joining in a corner, before you attach the worktop to the units, cut a metal joining strip to the depth of the worktop, using a junior hacksaw. |
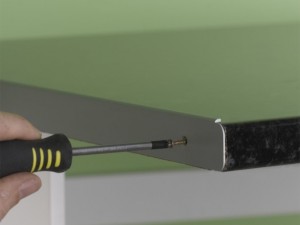 |
9. Apply silicone sealant along the edge of the cut length of worktop before screwing the joining strip in position through the pre-drilled holes. |
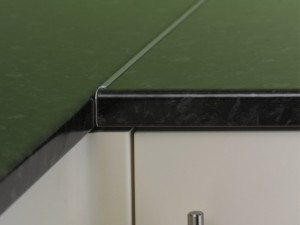 |
10. Apply more silicone to the joining strip before butting it to the adjacent length of worktop. Now fix the worktop in place as shown before. |
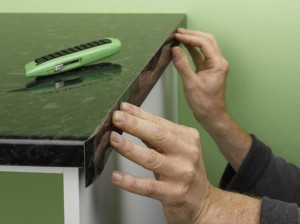 |
11. Finish any cut ends by using contact adhesive to stick the end strips in place. Trim with a craft knife for a neat finish when the adhesive has dried. |
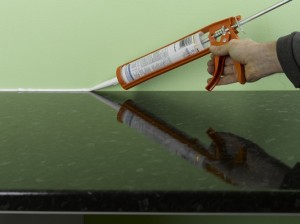 |
12. Run a bead of silicone along the back edge of the worktop and smooth it flush with the worktop surface for a neat and watertight finish. |
Kitchen worktop fitting tips
- Wooden kitchen worktops may come with a finished front edge, or a square edge that may then be finished to the profile you require. The square edge makes joining straightforward, but you will need a router to finish the front edge of the worktop.
- Corner joins should be planned into the layout so that the join is well supported by the units below.
- To cut and fit stone or marble kitchen worktops, always use a professional craftsman. They will make a template of your requirements once the units are in place.
- Seal wooden worktops for stain protection according to the manufacturer’s guidelines, usually with oil. Seal the top and underside. For the best oil, please take a look at my guide ‘Kitchen worktop oil’.
- Wooden worktops may have imperfections, but this is the beauty of a natural product. Fill holes with wood filler and sand smooth.
- The sequence above shows one type of laminate worktop. It is well worth checking out B&Q for further options as they have an extensive laminate range. If you are going down the wooden worktop route, Wickes offer a small but good quality range.

Granite for worktops does not have to be expensive as long as certain rules are applied to the buying granite worktop process, with any granite worktop supplier you must insist on a real granite sample so you can see the quality of what is being supplied.
Hi.
Thank you for your advice.
Where do you buy the worktop joining strips you use?
They appear more discreet than others I have seen.
Thanks
Ian
Hi Ian,
When I saw your comment, I must admit I thought good spot – they are flipping discreet. Then I started to think, mmmm could be something strange here – that looks an awful lot like an end cap to me!
Therefore my conclusion is either:-
a) They are incredibly discreet strips (which were supplied by the ‘late’ Focus DIY), so I can’t find out who the actual manufacturer is – although like you, I’d like to know!
or:-
b) On the day of that photo shoot, I was ready to start, stood next to an expensive photographer, designer, and editor, when I discovered that I hadn’t been supplied with a joining strip! Therefore I thought, okay the principles are the same, I’ll have to ‘wing’ it with an end cap, and take photo angles that don’t make it obvious.
My suspicion is b), although I honestly can’t remember as that sequence was in the middle of 40 days of photography, things are always hectic, and things do sometimes have to be ‘cheated’ a little more than I would like, in order to meet deadlines and targets.
I’ve just pawed over the original photos again, and I can’t quite tell if there is a rebate on both sides of the strip – one is obvious, but the other would certainly be so small that again, I’m leaning towards option b).
Therefore, many apologies if I’ve given you false hope of finding truly discreet joining strips, but if you do find one that works, please do let me know!
With very best wishes,
Julian