Preparing ceilings, walls, and woodwork
Preparing ceilings, walls and woodwork for decoration is probably the most important aspect of any decorating task. It’s an old saying, but it’s always the case that ‘good surface preparation will give the best finish’, but make sure you only do what preparation is necessary. For example, primers or sealers are only required if you are painting bare wood surfaces or bare plasterboard surfaces. If you are painting over a previously painted surface, you do not normally need a primer or sealer. Shown below are the best techniques for preparing ceilings, walls and wood.
Preparing wood
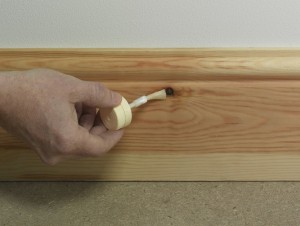 |
1. With new wood, apply two coats of knotting solution to any bare knots in the woodwork. This seals the knots and prevents any sap from bleeding through the paint. |
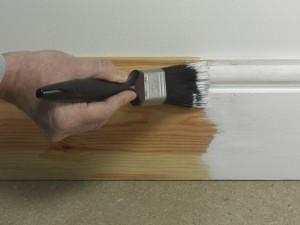 |
2. Once the knotting solution is dry, apply a single coat of wood primer. This provides the base for all subsequent coats of paint. |
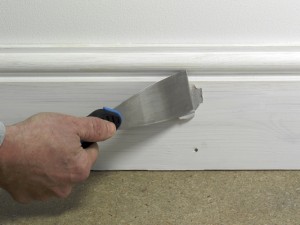 |
3. Once knotted and primed, you can use all-purpose filler or wood filler to fill the holes in the wood. If you are preparing previously painted wood, then this is where you would begin your preparation, by filling holes using the exact same materials and technique shown here. |
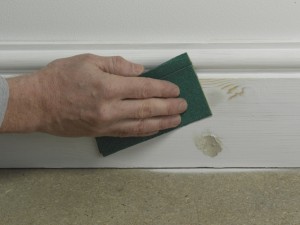 |
4. Filled areas need to be left to dry before sanding with a medium grade of sandpaper (80-120 grit). Use a vacuum cleaner or dusting brush to clean off the tops of skirting boards. |
Preparing walls and ceilings
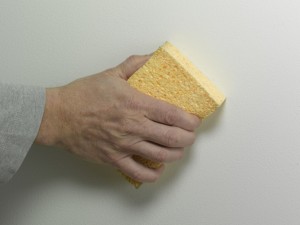 |
1. Old painted wall and ceiling surfaces become dirty over the years from smoke or fingerprints for example. Wash with a sugar soap solution and rinse with clean water. |
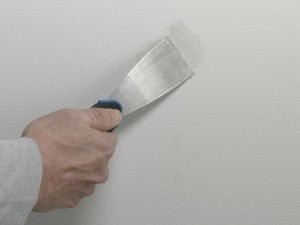 |
2. Fill any holes or cracks in ceilings and walls using a filling knife and all purpose filler. Leave the filler slightly proud of the surrounding surface. |
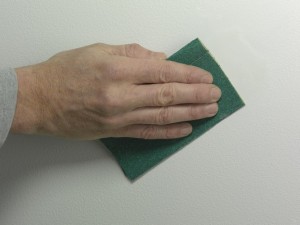 |
3. Once the filler has dried, sand off all excess filler to a smooth, flat finish. 120 grit sandpaper is ideal for this. Deep holes may take longer to dry and/or need refilling. |
Filling cracks
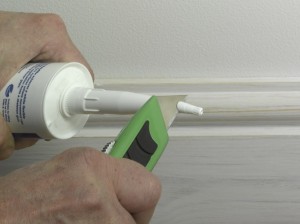 |
1. Cracks along joints between walls and skirting, ceilings and walls, or the corner junctions between adjacent walls, are best filled with a flexible filler (caulk) using a cartridge gun. Make this the last job you do before painting as you cannot sand caulk. Remember to cut the end of the tube and the end of the nozzle off the caulk tube before loading in the cartridge gun. |
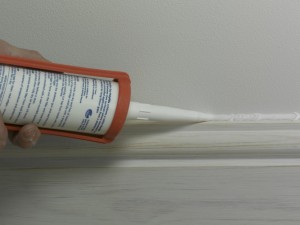 |
2. Caulk is simply squeezed out of the cartridge by pressing the trigger on the cartridge gun. Keep a steady hand, and even pressure on the trigger, gradually moving the nozzle along the joint to produce a neat bead of caulk. |
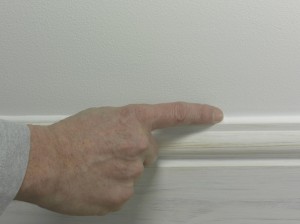 |
3. Smooth caulk with a wet finger and wash hands immediately after use. Alternatively you can wear some latex gloves. Once caulk is dry, you are ready to paint. |
Surface preparation tips
- Preparation is a messy business, so make sure that you have covered surfaces before you start work. Cotton dust sheets are best used on floors, whereas plastic disposable ones are good for any furniture that you can’t move out of the room.
- There is a large selection of fillers available on the market. You need a good all-purpose option for the walls – which may also be used for the wood. You can also opt for the 2 part epoxy based types  which will provide the toughest finish. The third type that is normally needed is the caulk or flexible filler. For more on caulk, see my guide ‘Caulk or silicone sealant?‘
- For much more information on filler types, see my guide ‘Decorating fillers’.
- You can avoid using both a knotting solution and primer if you choose an all-in-one option like Zinsser primer sealer which is available in most builder’s merchants. For more details on how to use paints like primer, see my guide ‘Which paint for wood?’
- Ceilings can often require a bit more than a simple fill and sand, and so for further details on the best options, I’ve written a whole guide dedicated to ceiling preparation – ‘Filling ceiling cracks’.
