Fitting a wall mounted basin
Fitting a wall mounted basin provides a greater challenge than fitting a pedestal basin, or basin in a vanity unit, as you need to pay serious attention to how the weight of the basin is going to be supported. Also, you will almost certainly need to adjust supply and waste pipe positions for your new basin, therefore more advanced plumbing skills are required, than would normally be the case if, for example, you were just changing over one pedestal basin for another. You will certainly need to know how, and where, to turn off the water supplies in your plumbing system.
You may only hang a basin on the wall, if stipulated by the basin manufacturer. Some basins are simply too heavy, or not designed for wall hanging, so just because you can see fixing holes at the back of the basin, they may be the ones designed for use in combination with pedestal support – therefore, always check.
The first issue to consider is whether you are hanging the basin on a solid (masonry) wall or a hollow (stud) wall. For masonry walls, as long as you use the correct fixings, the wall itself will provide enough support to hold the weight of the basin. For stud walls, you must add extra support inside the wall for successfully fitting a wall mounted basin.
| 1. When you position the basin, make sure that it is precisely level. You simply mark off the fixing points by reaching up under the basin, and marking through the pre-drilled holes. For masonry walls, depending on the current position of your supply and waste pipes, you may then need to chase out part of the wall surface in order to hide pipes, or, drill holes to take the pipes through the wall, whichever is more appropriate for your situation. Once your pipework is in place, you can hang the basin, and connect up as required, knowing that the masonry wall provides adequate support for the basin and fixings. | 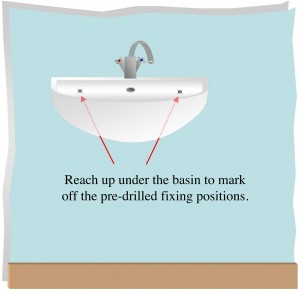 |
| 2. For a hollow wall, or stud wall, you need to ensure that the fixings go into the wooden studs. You cannot just use plasterboard wall fixings in this case. As luck would have it, you very rarely (if ever!) find that your basin fixing positions coincide exactly with the vertical studs. As shown in our situation here – both holes are no where near the studs. | 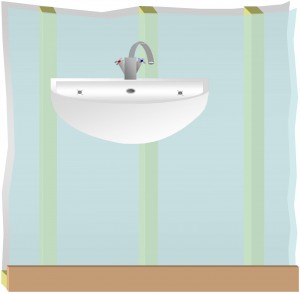 |
| 3. You therefore need to add extra support inside the wall. First take note of the exact position of your basin fixing points. This is easiest to do by measuring vertically down to the floor and making marks on the floor (You then simply measure back up from the marks later). Also measure between the fixing points. | 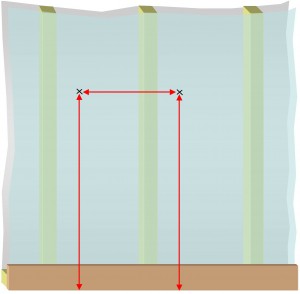 |
| 4. Cut out a section of plasterboard that spans between the vertical studs where the support will be required, and down to floor level. Use a drywall saw and craft knife – taking care not to cut/hit any hidden pipes or cables – see my guide ‘Filling holes in hollow walls‘. This wall is constructed of 100mm by 50mm studs, so I would use a similar dimension of timber for the noggin supports at fixing level. Also fit some 100mm by 20mm timber (or similar) supports below this – these will be used to clip pipework onto. | 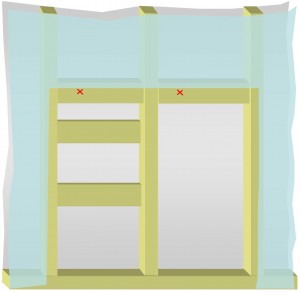 |
| 5. In this example the pipework is routed inside the wall, and clipped onto the wooden supports. Elbows have been fitted to both supply pipes and the waste pipe allowing further sections of pipe to be added and therefore direct the pipe tails horizontally out from the wall surface. | Â 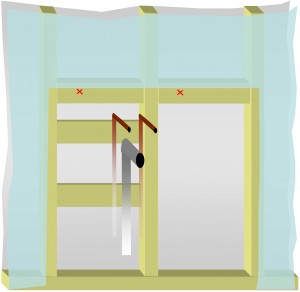 |
| 6. Once you’ve re-checked all your measurements, cut and fit a section of plasterboard over the hole, carefully measuring and drilling the appropriate size of hole for both the waste pipe and supply pipes. Make sure that you use the same depth of plasterboard that the wall is constructed from. Fix the plasterboard in place using drywall screws, making sure you insert screws along both sides of the join i.e. new plasterboard and old, as shown. Before patch plastering the area it is important to use some scrim tape along the joints to stop the joint cracking. You can use the traditional stuff, or, I personally find it much easier to use the self-adhesive scrim, although it is slightly more expensive. | 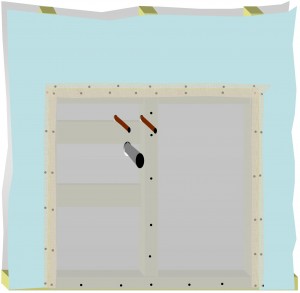 |
| 7. Use some patch finishing plaster to cover over the area. Again refer to my ‘Filling holes in hollow walls guide’ for more information on this. The smoother you get it the better, but bear in mind once its dry, you can sand and re-fill as necessary in order to get a perfect finish. | 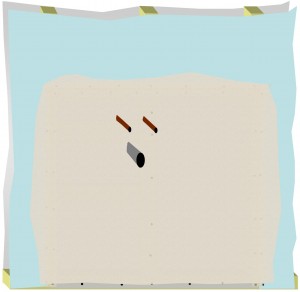 |
| 8. Once dry, redecorate the walls (always prime the plaster with a slightly diluted coat of your finishing paint), before applying two further full coats of your finishing paint to the wall as a whole. Depending on how you will connect your supply pipes to your basin taps, this would now be the time to fit isolation valves to the tap tails. If space is tight, you may choose to use all-in-one flexible tap connectors that incorporate the isolation valve. However, you need to plan well here, as the decision you make will be much dependent on your chosen tap(s). | 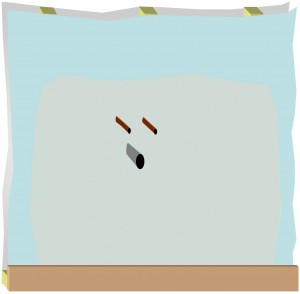 |
| 9. You can now re-measure to find your fixing positions, and fit the basin in place. Finally, connect up supplies and waste. | 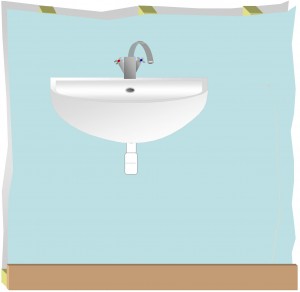 |
Things to consider
- For more information on fitting taps  and connections, please look at my guide – ‘Fitting a basin and taps’.
- Remember to take care when fixing into walls – using a cable, pipe and stud detector can help in finding safe fixing positions.
- If you plan to alter your bathroom, always ask a qualified electrician to advise whether or not the bonding and earthing arrangements in your home need to be improved for safety reasons.
