The Top 10 of DIY
Posted in Home Improvement Advice, Top Tens in DIY on January 16th, 2012 by Julian Cassell – 1 CommentThe top 10 of DIY sounded a bit more ‘catchy’ to me than “What are the most life-changing, time-saving, money-saving, ultra useful DIY or home improvement products or materials on the market?”, although this longer version is probably more accurate! DIY is made so much easier by using the right tools and materials for the job, but any product that adds that little extra bit of help with your DIY project, brings it into the area of being a ‘great’, rather than just a ‘good’, product.
The top 10 I’ve created below includes what I think are great products for DIY, not because they are made specifically for the DIY market, but more because they just make jobs much, much easier. In fact, I can’t think of any tool or material that was designed specifically for DIY that gets anywhere near my favourites list. Indeed I think the true test is that if a product is not used by the professionals, then I can’t see how it can be great for DIY. Therefore, everything below is used by the pros, but they are also great products for the home improvement enthusiast, and that’s why they get into my top 10 of DIY.
1. Combi drill/drivers
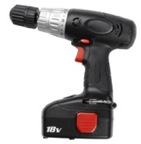 No big surprise here, as cordless drill/drivers are one of the truly great inventions, and amateurs and pros alike should always have one in their toolkit. The pros may choose to go a bit more heavyweight with their selection, but even a relatively cheap cordless drill/driver makes a massive difference to any drilling and fixing requirements around the home. Notice, I say ‘Combi’ in the title here as that means you can drill into masonry surfaces as well as softer surfaces such as wood. Much, much more on cordless drills in my ‘Cordless drill guide’.
2. Zinsser BIN
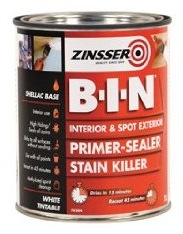 I’m not a big fan of all the one-coat paints out there, or any other kind of paint that claims to make decorating so much easier, but there is one paint on the market (there are other brands that do a similar thing) that is in my view revolutionary for decorating. Zinsser BIN is a primer that you use for bare wood that not only works as a primer, but because it contains shellac, it seals any knots in the wood as well. Therefore instantly it cuts out the knotting job (see here if you don’t know what knotting is all about). It also dries very quickly so you can crack on with further coats rather than wait a day for it to dry. It also seals damps stains, nicotine stains, in fact nearly any stain, so its a perfect partner when painting walls and ceilings as you can use it to spot prime before the decorative coats are applied. You used to only find Zinsser in builders merchants and specialist trade suppliers, however now you can even find it on Amazon
.
3. Isolation valves
The first of my plumbing products, and one that always brings a sigh of relief for any home improvement enthusiast when they are digging around below a sink or bath, desperately searching for where they need to turn off the water supply. In fact if you don’t find isolation valves close to your taps, it often changes the job from a DIY one to a professional one, as when you need to start draining down household water systems in order to change taps or toilets for example, things can get a lot more complicated. There’s plenty of isolation valve use in my ‘Bathroom guides’.
4. Post mix concrete
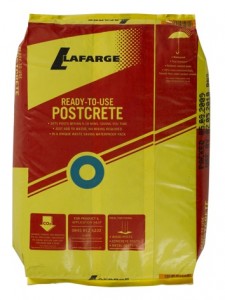 This comes under a variety of trade names, but basically its quick drying concrete supplied in bags. Anyone who has tried sinking fence posts, decking posts or any other type of post in the garden knows that using standard concrete is hard work, but with the ready mixed stuff, you don’t even need a shovel. The only tool you need is a watering can, as you can literally pop the post in a hole, pour in the mix, add a bit of water, prop it vertical for an hour or so, and then it’s rock solid. If you don’t know how easy it is to use, have a look at my ‘Garden structure guides’.
5. Clingfilm
No, I haven’t changed over to a cooking guide, as clingilm is essential for any decorator’s toolkit. Use it to wrap brushes during tea breaks, and to save constantly cleaning and washing out equipment. With a roller, between coats, overnight, or even for a few days, you can wrap the head in clingfilm and it will still be fresh when you unwrap it. The savings in time, let alone water and cleaning fluids is immense. I sometimes use it when I’ve mixed up too much filler at the start of the day – just wrap it in some clingfilm, and if you need it later in the day it will still be okay to use.
6. Flexible tap connectors
Trying to line up copper pipes with tap tails is a job for a decent plumber unless you have endless hours at your disposal, and are pinpoint accurate in your measurements. As the name suggests, these tap connectors are incredibly flexible and so being a few centimetres out in your measurements is not a problem because these little lengths of flexible pipe will easily rectify any such inaccuracies. Okay, flexible tap connectors are not pretty, and sometimes you need direct pipe-to-tail connection for particularly decorative situations with a freestanding bath for example, but generally the connection between taps and supply pipes is hidden from view in a vanity unit, behind a pedestal or up under the bath behind a panel. To see some tap connectors in action, see how much easier it makes ‘Fitting a bath and taps’.
7. Brush Mates
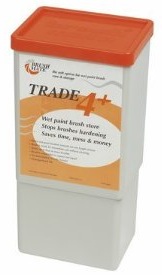 If you use oil-based paints a lot, you really need a Brush Mate. These little boxes, revolutionised my decorating life as it saved hours, and even days in terms of brush cleaning, as well as saving me a fortune in white spirit. Basically, you pop your used brush inside the Brush Mate, without cleaning, and it remains ‘wet’ until the next time you use it – which can literally be months. You do need a bit of Brush Mate fluid for the whole system to work, but basically, this costs pennies compared to what you save on white spirit, and throwing brushes away because you forgot to clean them out, or left them sat in white spirit for too long. The big version carries twenty odd brushes, which is more for the professional, but you can get the little four brush option, which is just perfect for DIY.
 If you decide to get one, look out for a nice little kit deal with the Brush Mate where you can buy it along with a good supply of the Brush Mate fluid – normally available on Amazon.
8. Volt Stick
A volt stick is basically a voltage tester that you hold next to a cable or wire to check for AC voltage. If the light on the tester comes on, it’s confirming the cable or wire is live. For DIY use, you may say why bother, but this little tool can just take hours out of finding out what appliance keeps tripping your mains, or where a problem may exist. You need to pay close attention to the manufacturer’s instructions, and limitations with volt sticks, but even if the most electrical DIY you do is change a light bulb, I guarantee you that these are great bits of kit to have around.
9. Protective gloves
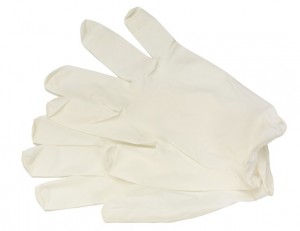 Now, here I’m not talking about leather rigger gloves or super protection professional gauntlets of any description, just simply the lightest of lightweight pvc or latex gloves, more commonly associated with a surgeon than with a home improvement enthusiast. When doing any sort of decorating work, or even mixing cement, or plastering, or any ‘wet’ trade, if you wear these cheapest of cheap little gloves, you save hours on cleaning your hands, along with keeping all the nasty products off them in the first place. Okay, they are ‘throwaway’ so there is a bit of an eco-unfriendly aspect, but I think this is more than compensated for by the amount of water you save, let alone all the other hand cleaning products normally required to get all the other chemicals off your hands at the end of the day.
10. Push-fit plumbing joints
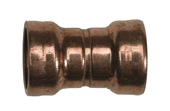 Yes, a third plumbing product but what a winner. Whether plastic or copper, pushfit joints simply mean there is no need for solders, blow-torches and all the other paraphernalia needed to make a traditional joint. Combine these with my other two plumbing favourites of flexible connectors, and isolation valves, and suddenly many plumbing jobs are changed from ‘always needing’ to have professional help to ‘not that often needing’ professional help. Yes, the joints are slightly more expensive than traditional options, and yes for exposed pipework, a little ugly, but for hidden pipework under baths and kitchen sinks, push-fit joints are so easy to use. The basics of push-fit joints are shown in my ‘General plumbing guides’.
Now there were other contenders for this list, flexible decorator’s caulk for example, but at the moment the above are my stand out ten. I may look to revise this list as time goes on, but as far as DIY advice, or even hints and tips go, this top 10 of DIY will definitely save time, money, and in some cases the environment, as well as make your DIY much, much easier.

