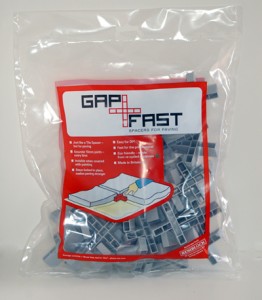
 Gapfast spacers are a new product on the market, and are quite simply a tile spacer for paving slabs. When I was first approached to offer an opinion on their suitability for the DIY market, I did ask myself the same 2 questions that always come to mind when any new product appears – “How did we manage up until now?” and therefore “Is there any need for it?”.
Well for me, maintaining a gap between paving slabs has always been achieved with offcuts of wood, commonly bits of ply wedged in position, and then removed once the slabs are set in place. The idea with the Gapfast spacer is to position one at all slab corners, and for it to remain in place, and then be pointed over in the same way as tile spacers on a tiled floor or wall are grouted over. I do have a slight problem with this, as although I’m okay with grouting over wall tile spacers as long as the tiles are not too thin, and therefore the grouting will sufficiently cover the spacer, I do have reservations with grouting over floor tile spacers. Why? – Well, because you will often get problems with floor tile joints cracking because there is not a sufficient depth of grout covering over the spacers, and obviously floors are put under much greater stresses than wall tiles.
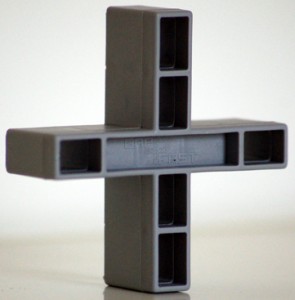
 Now, I do not think this problem is a deal breaker with Gapfast as I think in practice you would use them marginally differently to a tile spacer. Firstly, you’d make sure they were pressed slightly into the bedding layer below the slabs, so that you would effectively ensure that even with relatively thin slabs, there would be a good depth of pointing above the spacer. Also the Gapfast spacer design is hollow, so that your pointing material would be taken into the structure of the spacer itself. But even if you couldn’t bring yourself to point over them, you could just as easily use the spacer in a pegging fashion (like most pro tilers), where you insert one leg of the spacer into a joint, normally two spacers per tile side, and then remove them all once the layout is set. This also means the spacers are reusable.
So in conclusion, yes I think these are useful pieces of kit that would certainly help in laying slabs. Are they essential? No, but you could argue the same about tile spacers, and let’s face it, the vast majority of us use them.
In making your mind up, you need to weigh up the price tag of £11.99 for a pack of 50, against the time messing around in sorting out a load of ply or wooden offcuts. Also, Gapfast do point out the increased structural integrity that the spacers provide, and so you need to add that to your deliberations.
They are due to be launched in all the big DIY outlets, but at the moment you need to go direct to Gapfast, where you will also find plenty more information about the spacer, along with plans for more products in this area. Personally, I’m looking forward to giving the Gapfast spacer a go! Also keep an eye on the ‘Paving Expert’ website as they’re going to give them a case study in the near future.

 Gapfast spacers are a new product on the market, and are quite simply a tile spacer for paving slabs. When I was first approached to offer an opinion on their suitability for the DIY market, I did ask myself the same 2 questions that always come to mind when any new product appears – “How did we manage up until now?” and therefore “Is there any need for it?”.
 Now, I do not think this problem is a deal breaker with Gapfast as I think in practice you would use them marginally differently to a tile spacer. Firstly, you’d make sure they were pressed slightly into the bedding layer below the slabs, so that you would effectively ensure that even with relatively thin slabs, there would be a good depth of pointing above the spacer. Also the Gapfast spacer design is hollow, so that your pointing material would be taken into the structure of the spacer itself. But even if you couldn’t bring yourself to point over them, you could just as easily use the spacer in a pegging fashion (like most pro tilers), where you insert one leg of the spacer into a joint, normally two spacers per tile side, and then remove them all once the layout is set. This also means the spacers are reusable.