Adding trellis to a fence
One way of gaining greater privacy in your garden is to add trellis to a fence. This also allows you to grow creeping plants along the trellis, which will clearly be attractive as well as obscuring. Fortunately, the process is very straightforward as all that is required to add some extra height to a fence post is a post extender – you may also find these called post collars or post extension collars.
 |
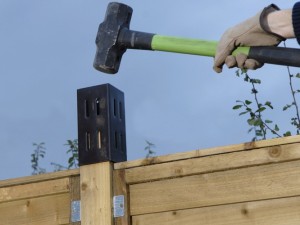
1. First, you simply take off the existing post cap. Then, position the post extender and tap it in place. I’m shown using a sledgehammer here, which is a little over the top! A hammer or lump of wood would work just as well, but if you are using a sledgehammer or the like, just be careful not to distort the shape of the post extender. |
 |
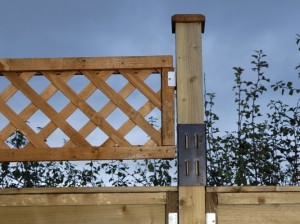
2. All you do then is to simply knock in the required length of post and add a post cap, and repeat the process for however many extensions you need. Use fence brackets to secure your trellis in place, and add a couple of screws to the holes in the extension bracket to hold it firmly in position. |
Trellis panel tips
- You clearly need to do a bit of measuring up, and you’ll find that trellis panels are generally supplied to the same width as fence panels, so just do some thinking about your size and design requirements.
- Also double check the size of post and extension piece that you require. Fence posts are generally 10cmx10cm or 7.5cmx7.5cm in cross section.
Where to buy fence extenders
You may well have some luck down at your garden centre. Many of the big DIY outlets don’t stock them, but you will find them on Amazon
