Wallpapering a room
Before wallpapering a room it is essential to prepare the walls so that they are in as good a condition as possible for hanging the wallpaper. If you need to strip the walls of their existing paper, see my guide ‘Stripping wallpaper‘. Fill any small holes in the walls with all-purpose interior filler. When dry, sand smooth and sand the remaining wall surfaces to remove any rough areas. The smoother you get the walls, the better the finish. If you are painting the ceiling and woodwork in the room, do this first, as it is much easier to wipe excess paste off painted surfaces than paint off wallpaper surfaces. Check the wallpaper manufacturer’s label to see if you will need wallpaper paste to hang the paper. If it is ready-pasted, you only require a wallpaper trough. In some cases, you may not need either as it is self-adhesive off the roll, and in some cases you may need to paste the walls and apply the paper direct to the wall surface. The most common wallpaper is still the paste-the-paper variety and the technique for hanging is shown below. Wallpaper may be applied to any sound flat wall surface, but some manufacturers may specify lining the walls with lining paper first. Lining paper is applied just like wallpaper, but with no pattern-matching requirement.
To work out how much wallpaper you need, divide your wall area by the area of one roll (which should be on the packaging).
Height of room multiplied by wall width = The number of square metres.
Square metres divided by single roll area = How much you need.
Its always best to add 10% for cutting waste (15% for large pattern papers). Most rolls are around 50cm by 10m in length, which equates to 5 square metres.
The starting point when wallpapering a room is important in order to establish a balanced pattern. Generally, start near a corner, as shown in the steps below, or, for larger pattern papers, centralise the pattern on a chimney breast or centre of a feature wall, for example. For more on this, see my guides ‘Where to start wallpapering’Â and ‘How to wallpaper a chimney breast’.
 |
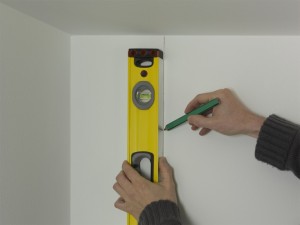 |
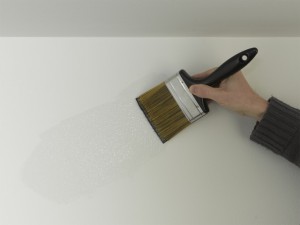
| 1. Paint the wall surface with 5:1 PVA solution (five parts water to one part PVA) and allow it to dry. | 2. At the starting point, use a spirit level and pencil to draw a precisely vertical line on the wall surface. |
 |
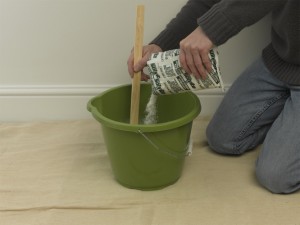 |
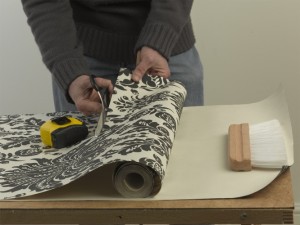
| 3. Measure the height requirement for the first length and add 20cm to this figure. Mark the length on the paper and cut. | 4. Mix wallpaper paste in a bucket as directed by the manufacturer. Alternatively, you can use ready mixed paste. |
 |
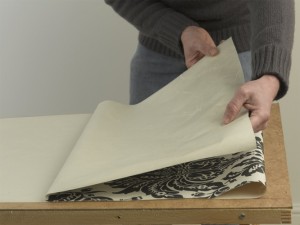 |
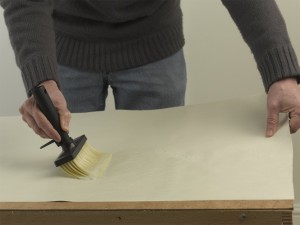
| 5. Apply paste to the wallpaper ensuring even coverage, paying particular attention to the edges. | 6. Loosely fold the length of pasted paper into a concertina as shown. Allow the paper to bend, but not crease. |
 |
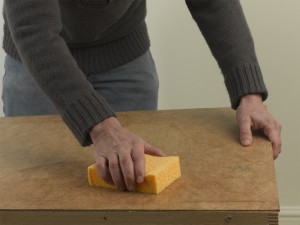 |
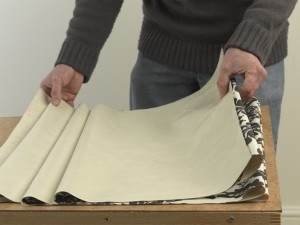
| 7. Let the paste soak into the paper – normally about 5 minutes, but always follow the manufacturer’s guidelines. | 8. Move the wallpaper off the pasting table and wipe excess paste off the table using a clean damp sponge. |
 |
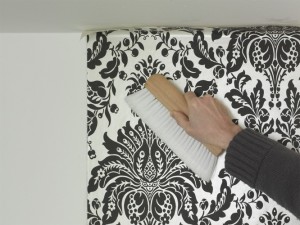 |
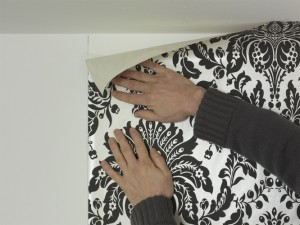
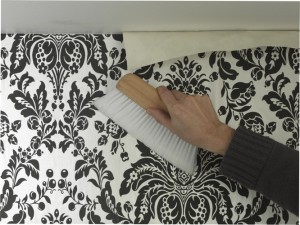
| 9. Unfold the pasted length and offer it up to the pencil line. Position any large patterns to show the main design to best effect. | 10. Smooth and align the paper with the pencil guideline. Brush from the centre of the length out towards the edges and from the top of the length to the bottom. |
 |
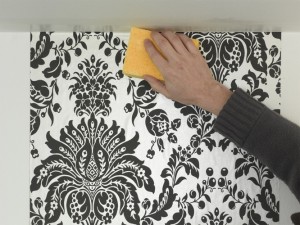 |
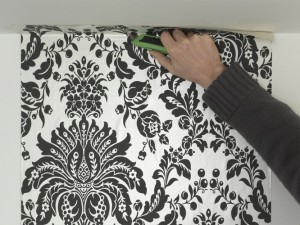
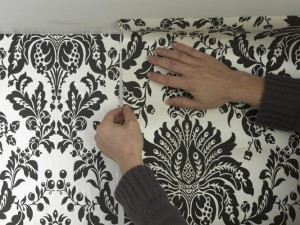
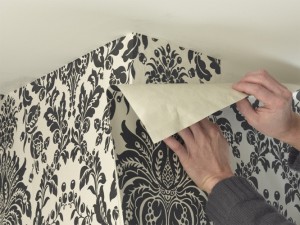
| 11. At the top of the wall, crease the paper into the junction at the wall and the ceiling. With the paper sharply creased, trim along the crease using a craft knife. Or, pull the paper back and cut with scissors. | 12. Remove any excess paste from the paper, ceiling and wall surface with a clean damp sponge. Repeat step 11 at skirting level to ensure a neatly trimmed edge along the top of the skirting board. Again, sponge away excess paste. |
 |
 |
| 13. Measure further lengths by matching the pattern dry next to the previous length. In this way, you will minimise any offcut wastage. | 14. Cut, paste and add further lengths, taking care to always match the pattern perfectly at eye level. Tightly butt-join lengths, and regularly sponge off excess paste. |
 |
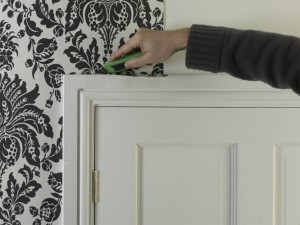 |
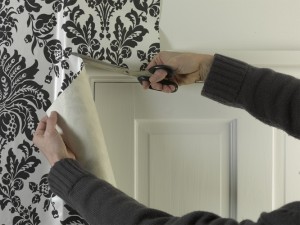
| 15. At a door, allow paper to flop over the corner of the architrave. Carefully cut to the wall surface at the corner of the architrave, taking care not to tear the paper. | 16. Crease the paper along both edges of the architrave and trim in the usual way using a craft knife or scissors. |
 |
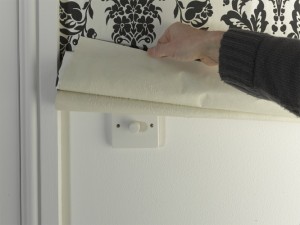 |
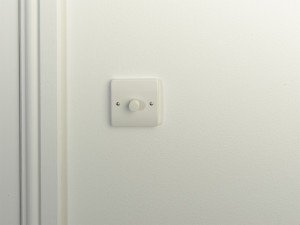
| 17. At a socket or switch plate, first turn off the mains electrical supply at the consumer unit. Then loosen the screws and plate. | 18. Flop the paper gently over the fitting, allowing a slight impression of the socket/switch plate to shown through the paper. |
 |
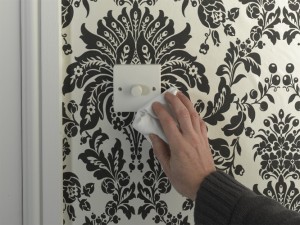 |
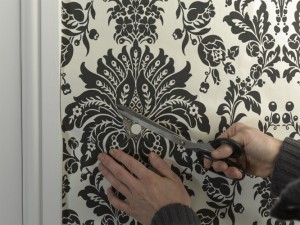
| 19. From the centre of the fitting, make four cuts towards the corners, but stop each cut 2-4mm from the corner. Trim off these flaps and manooeuvre the fitting through the hole. Loosen the retaining screws a little more if it helps. | 20. Smooth the paper, taking care not to allow any paste behind the fitting. Use a dry cloth to remove any excess paste. Retighten the screws. |
 |
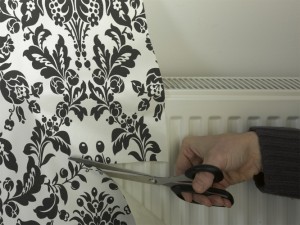 |
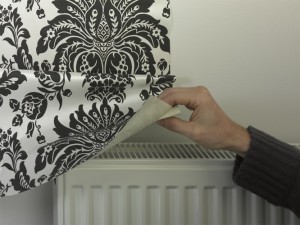
| 21. When you reach objects such as radiators, allow lengths to flop loosely over the corner of the radiator. | 22. Trim back the paper but leave at least a 10cm excess overlapping the front and side of the radiator. |
 |
 |
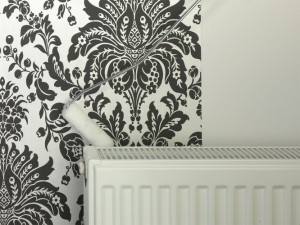
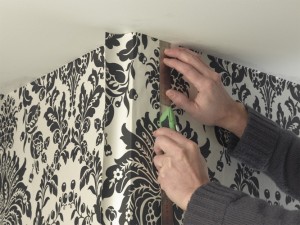
| 23. Use a radiator roller to push the paper behind the radiator, carefully smoothing it down without any creases. | 24. At external corners, fold paper around the corner and pattern match a new length over the top of the first. |
 |
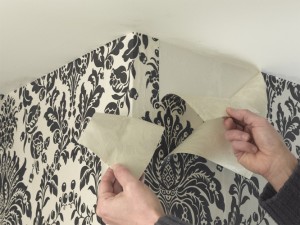 |
| 25. Maintain the vertical with a spirit level, and then slice through both sheets with a craft knife using a straight edge for guidance (a steel rule is ideal). | 26. Carefully pull back the overlap and remove the two strips of excess paper left as a result of the cut. |
 |
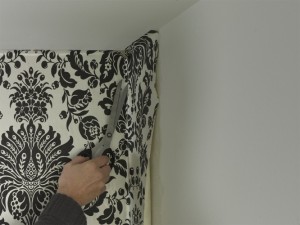 |
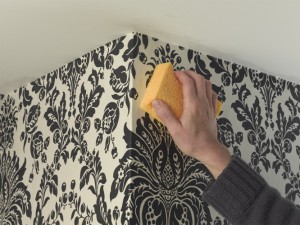
| 27. Smooth the paper back in place with a sponge to create a neat butt join along both straight trimmed edges. | 28. At an internal corner, allow the length to fold around the corner, then trim back to 1 cm from the corner along the length. |
 |
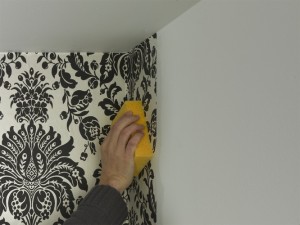 |
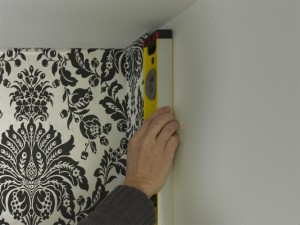
| 29. Crease the trimmed length into the corner, and use a spirit level to ensure you start the next wall (with the other ‘half’ of the trimmed length) maintaining the vertical. | 30. Use some overlap adhesive along the corner, and be sure to remove excess with a clean sponge. Continue papering to finish the room. |
Wallpapering tips
- As an alternative to PVA, you can use size or make your own size (dilute wallpaper paste). If you do not do this, the paper can often dry out too quickly, and it also helps by allowing you to easily slide the paper into position across the wall surface.
- You should not wallpaper over another wallpaper unless it is stuck down perfectly. Some papers are peelable, allowing you to peel off the top layer, leaving the backing layer to act as a lining paper for the new wallpaper. Again, this is only an option if it is firmly stuck down. Therefore, in the vast majority of cases, it is always best to start from scratch, by removing all the old paper first.
- The most common problems with wallpapering a room are found at corners as most are not precisely ‘square’ and therefore the wallpaper may crease or be thrown off vertical if you try to round the corner with one length of paper. The techniques shown above will overcome any such problem.
- Windows can effectively be treated like a collection of corners. In most cases, where recesses are shallow, it may be possible to bend the paper lengths around the corners without creasing it, otherwise use the corner techniques as shown above. See my guide ‘Wallpapering around a window’.
- Where you have to overlap, such as in internal corners, it is always best to use an overlap adhesive – or use neat PVA.
- If you are using a ready-pasted paper, the techniques for hanging are the same as above except there is no need to have any paste. Basically the paste is dried on the back of the paper and is reactivated when you soak the paper in water. Therefore in such cases, it is necessary to buy a wallpaper trough, into which you immerse each roll of paper before hanging.

Hi Julian – this is a brilliantly concise guide to how to hang wallpaper – and great that you have included imagery also. Fantastic. We are currently in the middle of creating a vodcast about the same thing, would love to hear your thoughts when we publish it?
Hi Melanie – glad you like the guide and I look forward to seeing your vodcast when its out.
Thank Julian – will make sure I get it out to you as soon as it is ready.
Do let me know if you ever want to do to a guest post on my blog, or vice versa.