Laying wood and laminate floors
Wooden floors can all be laid in many different ways. However, most commonly, engineered wood and laminate floors use a clip-together system, where sections of the floor are slotted together using a tongue-and-groove connection system. This system can vary between manufacturers (some require adhesive, although most now don’t), but the principle of how these floors are laid remain fundamentally similar.
The best finish is achieved by laying the floor with skirting and architrave removed. This is refitted after the floor is down, so that cut edges are covered and a neat finish is achieved. Use edging beads if you do not wish to remove skirtings and architraves, or it is too difficult for you to do so. An excellent finish may still be achieved and this technique is shown below. No fixings or adhesives are used when laying most engineered wood and laminate floors as they are laid ‘floating’. By following this technique, weight alone will keep them in place. Underlay is essential to ensure comfort underfoot and act as a shock absorber – different types and thicknesses are available. Also a damp proof membrane (dpm) may need to be laid to protect from moisture – always follow your manufacturer’s specific guidelines. The dpm is basically a plastic sheet that is rolled out and cut to fit around the edge of the room. To save time, you can buy an underlay that is combined with a dpm.
How much flooring you need may be worked out by dividing the required floor area by the area of one pack of your chosen flooring. Measure in metres and round up to the nearest half metre.
Length of room multiplied by width of room = The number of square metres
Square metres divided by pack coverage = How much you need
Its always best to add 10% for cutting waste.
Remove doors before starting work and refit them once the floor is down as once you have laid the new floor, you may need to trim the base of the doors before refitting them, because of the new height of the flooring.
The best starting point is to work back from a straight wall. If your room is very ‘unsquare’, adjust the starting position according to which is the squarest corner and adjacent wall. When skirtings and architraves are in place (i.e. you haven’t removed them) start on the ‘door’ wall, so that a neat edge is most easily achieved – again this is shown in the technique below.
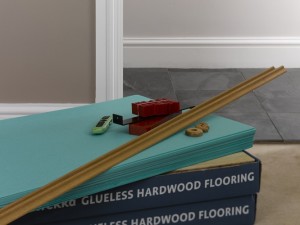 |
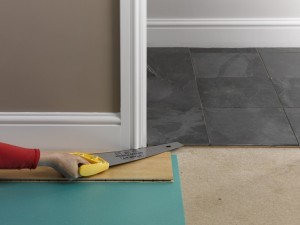 |
| 1. Plan your work to begin with the first row of boards running along the wall containing the door to the room. | 2. Trim the architrave so that the flooring will slide under it. Use a piece of underlay and flooring in order to trim the correct depth. |
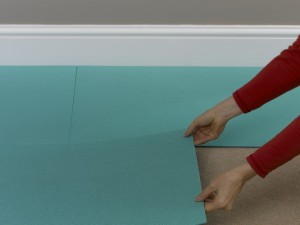 |
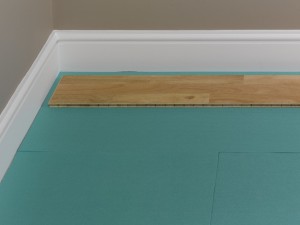 |
| 3. Lay underlay in rows, butt-joining the panels. Cover the whole area and trime edges when required using a craft knife. | 4. Position the first board in the corner – the long tongued side of the board should be facing the wall. |
 |
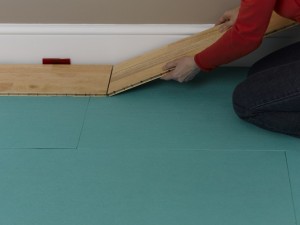 |
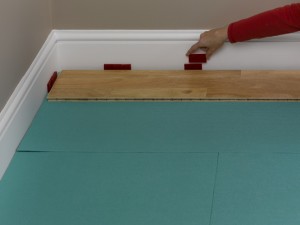
| 5. Position some wedges around the edge between the skirting and the board creating a 10-15mm expansion gap. | 6. Take another board and connect the short ends together. Normally this involves joining at a 45 degree angle. |
 |
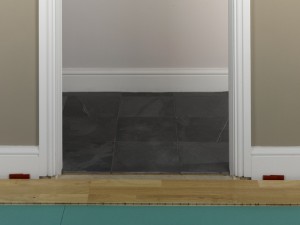 |
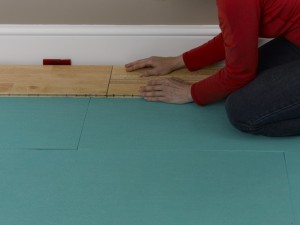
| 7. Push down and towards the joint to lock the board in place. A tap with a knocking block may be required. | 8. At the doorway, allow the boards to span across the gap, but put a wedge either side of the entrance. |
 |
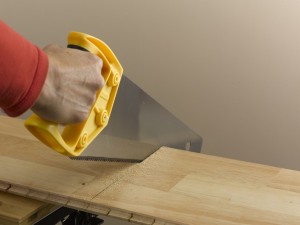 |
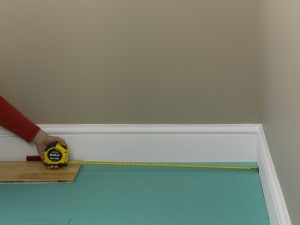
| 9. Keep adding lengths and wedges. At the end of the row, measure the distance required to infill with a cut board – remember to allow for the expansion gap. | 10. Boards may be cut with a panel saw or jigsaw (which is ideal for more intricate cuts). |
 |
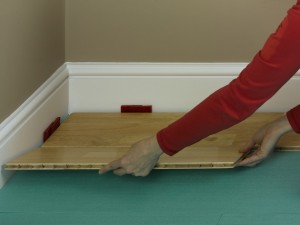 |
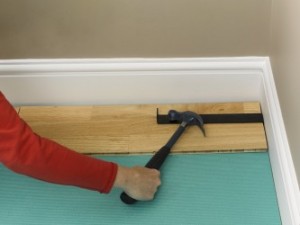
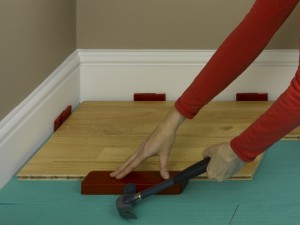
| 11. Clip the final board in place. You will need a jemmy for this – lip over the end of the board and tap as shown to tighten the join. | 12. Start the next row with the offcut of board from the last row. The join is first made using the same technique for the short ends of boards in the first row i.e joining at a 45 degree angle. |
 |
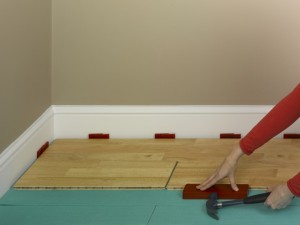 |
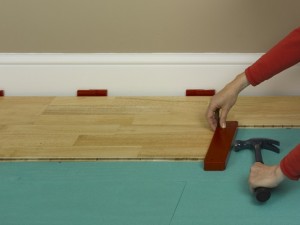
| 13. Once this first offcut board is in place, one or two taps using a hammer and knocking block will be required to tighten the join. | 14. To connect the next board (a full length one), engage the long edge first and tighten with the knocking block and a few taps of the hammer. |
 |
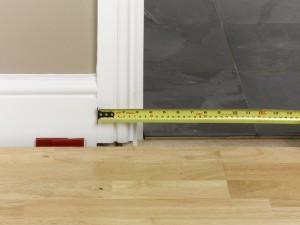 |
| 15. Use the knocking block to tighten the joint with the short edge of the previous board. Keep adding boards to complete the second row. | 16. At the door, measure between the outer edge of each architrave, less an expansion gap (10-15mm) at each end. Cut a board to this length. |
 |
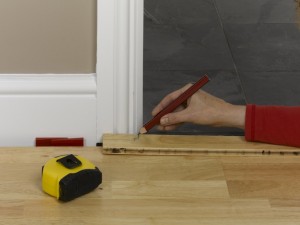 |
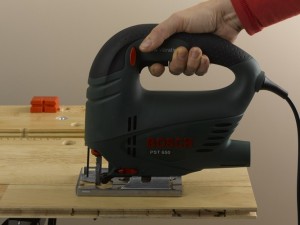
| 17. Trim the board lengthways to a width that will allow the joint between the different room floorings to be under the door. | 18. Mark where to trim either end allowing for the length to slide under the cut architrave. This cut will be simplest to make using a jigsaw. |
 |
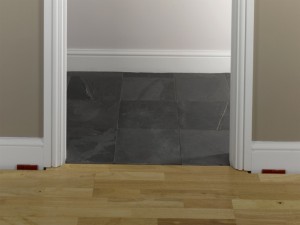 |
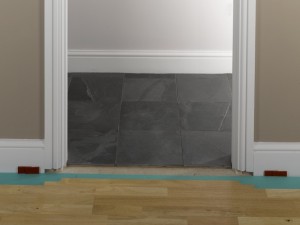
| 19. Carefully slide the first two rows of boards away from the doorway so that you can easily join the cut piece to the edge, in front of the doorway. Ensure that the trimmed ends are lined up to slide under either side of the cut architrave. | 20. Push the two rows back in position, allowing the cut piece to slip neatly under the architrave on either side. Continue with the third row of boards, and subsequent rows, to cover the floor area of the rest of the room. |
 |
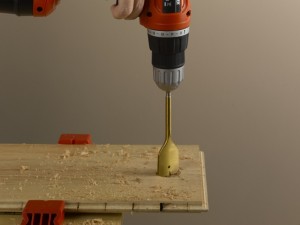 |
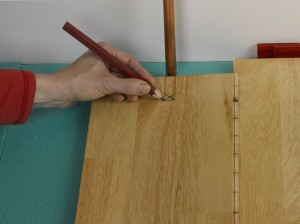
| 21. For pipes, such as those for radiators, mark off the pipe position on the end of the board, by measuring pipe width and distance from the wall. | 22. Drill a hole with a large enough flat bit to allow for a gap around the pipe. For a 15mm pipe, use a 32mm bit. |
 |
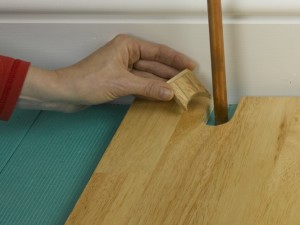 |
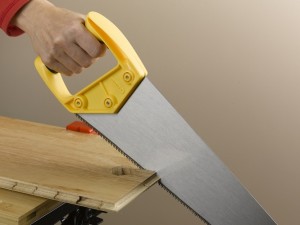
| 23. Carefully cut out the area between the hole and board end – use a panel saw or a jigsaw. Keep the piece you’ve cut out. | 24. Position the board in the normal way. Apply some grab adhesive to the small cut piece and press it in position to fill the gap. |
 |
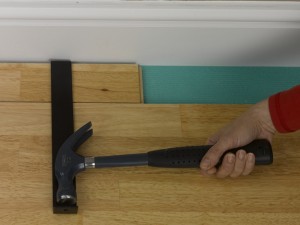 |
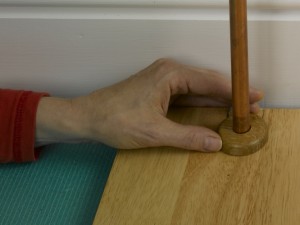
| 25. Fit a pipe collar around the base of the pipe. Use a dab of grab adhesive to keep it in place. | 26. In the final row, trim the boards to fill the gap, allowing for the usual 10-15mm expansion gap. You’ll need to use the jemmy to secure these final boards in place. |
 |
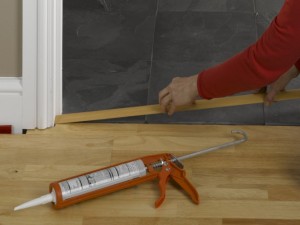 |
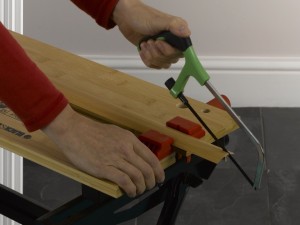
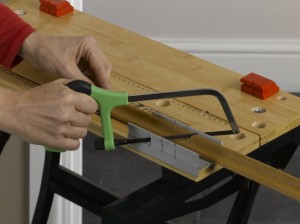
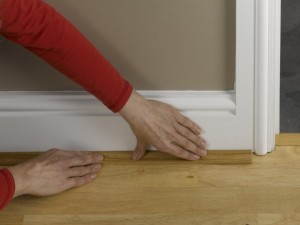
| 27. To neaten the join with the floor in the adjacent room, use a threshold strip. Trim the strip to fit using a junior hacksaw. | 28. Fit the threshold with grab adhesive. Remove the wedges around the floor perimeter – some manufacturers may stipulate fitting cork strips in the expansion gaps. |
 |
 |
| 29. Measure the lengths required for the edging beads – used to cover the expansion gaps. Use a mitre block to cut the ends that will join at corners. | 30. Apply contact adhesive along the back edge of the strips (skirting board edge) and press into place. |
Laminate and engineered flooring tips
- Underlay panels are shown above, but you may also use rolls of underlay.
- Some of these clip-together floors are sold unfinished and will therefore require coating once laid. Engineered solid wood floors also offer the option of being able to sand back and refinish them at a later date. This cannot be done with laminate floors.
- Laying these types of floors is a very straightforward process, with the trickiest areas normally being to do with the door or doorway. This is why it is easier to lay these floors with skirtings and architraves removed, as you have much more room to manoeuvre boards into place.
- Some manufacturers will stipulate the need to store the flooring in the room they are to be laid for a couple of days to acclimatise to conditions.

Great overview to installing wood flooring. If someone is planning to lay flooring themselves then i would always recommend either a good quality laminate floor such as Berry or Quick Step. Or a really nice engineered wood flooring (which looks and feels like hardwood flooring, but much easier to install).
can NOT get step 15 to work since the short ends need to be inserted at a 45 degree angle like in step six. Been trying to tap the board into place all day no give at all. please elaborate.
Depending on what exact floor type you have, you may have to make small adjustments to the principles shown above.
Some floors require a whole line of boards to be connected short ends first (at 45 degrees), before the whole line is then connected to the previous line of boards. This may, or may not, be the case with yours – check the manufacturer’s guidelines as they should give you the precise fitting instructions.
Hope this helps,
Best,
Julian
I want to lay engineered flooring in a hallway with 7 doors, some of which are opposite each other. I can do what you suggest in steps 19&20 on one side, but obviously on the opposite side I won’t be able to slide the floor far enough away to fit under the architrave on the second side. Any hints or tips for this please. Also I have two doors which will be end on to the run, how do I get under the architrave with these?
Hi Mark,
Always tricky in hallways with doors either side. You need as much ‘wriggle’ room everywhere, and therefore I would almost always have all the skirtings and architraves off in this situation.
Especially if your particular floor requires joining at 45 degrees before knocking in place. You can try to slide boards once in position which is another technique to adjust where to make joins – this often helps.
With the doors at each end, you should find it easier as they are only the short ends going into the doorway, therefore you don’t have to span the whole entrance with a single long board.
Difficult to help much more without seeing the specifics, but removing all architraves and skirtings really would make life much easier, and that would be my starting point.