Fitting a floating shelf
Floating shelves are normally supplied with manufacturer ‘s guidelines for fitting, but most designs are similar to that shown in the sequence below, where wall brackets are positioned and the shelf simply slides onto these to provide the illusion of no fixings holding the shelf in place. As always, take great care when fixing into walls so as to avoid cables and pipes that may be buried under the wall surface. A cable, pipe and stud detector will help in finding suitable fixing points for fitting a floating shelf.
 |
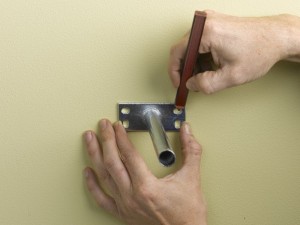
1. Position one wall bracket and mark through the fixing holes. |
 |
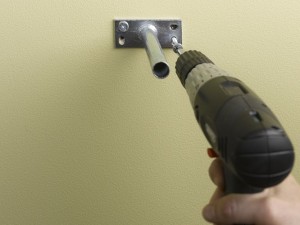
2. Drill holes, insert wall plugs and fix the bracket temporarily in place. Two screws are used here to hold the bracket in position. |
 |
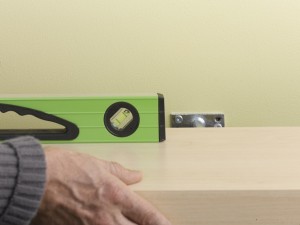
3. Insert the other shelf bracket into the back of the shelf. Then push the shelf onto the fixed bracket. Adjust the shelf position until it is level. Then simply mark the position of the unfixed bracket on the wall. |
 |
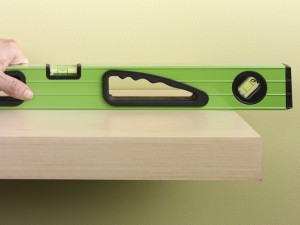
4. Remove the shelf from the brackets, and  drill holes as in step 2 before inserting wall plugs and fixing the bracket to the wall. Again just use two screws initially. You can then reposition the shelf, and check for level once more. Adjust the bracket positions slightly if required, and once satisfied they are level, insert and fix the remaining bracket screws and then push the shelf in place. |
Floating shelf tips
- Should you need any further information on fixing into different wall surfaces, see guides ‘Fixing into masonry walls‘ and ‘Fixing into hollow walls‘.
- Longer floating shelves may have more than two wall brackets. Measurement and marking off bracket positions accurately can be helped by using a spirit level and pencil to draw a perfectly level horizontal guideline on the wall surface. Corresponding fixing points may then be checked according to this line.
- When fixing any type of shelving system you will certainly need some sort of drill. Take a look at my guide – ‘Buying a cordless drill’, for more information on the best options available.
