Erecting a fence on soft ground
There are many different types of fence, but in this section I’m showing one of the most common designs, often called a panel fence. Even if your chosen design is not like this, most (if not all designs!) require posts, and you can adapt the technique shown here to suit your requirements. The technique you use is first determined by whether you are on soft or hard (concrete) ground. The technique for erecting a fence on soft ground is shown here (for hard ground, see the guide – ‘Erecting a fence on concrete’). To secure fence posts in place, there are basically two options. You can either concrete the posts in or sink post spikes into the ground. I prefer the concrete method, and manufacturers now produce a bagged concrete mix (post mix) which makes the whole process much, much, easier. It is this technique I’m showing below.
 |
| 1. Define the fence line using a string line. Use a batten cut to the width of a fence panel to space the posts. Mark positions with a coloured aerosol spray. |
 |
2. Dig a hole for each post, which should be no less than 50cm deep and 30 cm square. |
 |
3. Pour gravel to a depth of about 10cm into the bottom of the hole before putting the post in and packing gravel around its base. |
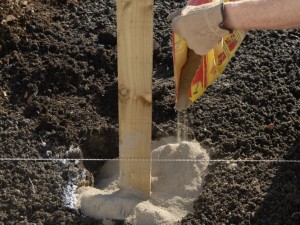 |
4. Fill the hole to the top with ready made post mix and tamp it firmly around the base of the post. |
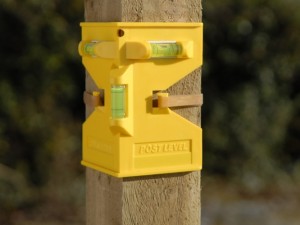 |
5. Keep checking the post to see that it’s vertical. Purpose made post levels are ideal for this as you simply attach them to the post with an elastic band, freeing your hands up for adjusting post position as required. |
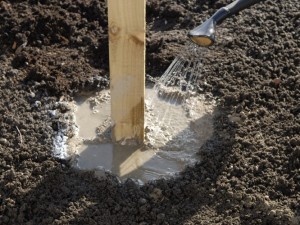 |
6. Carefully water in the post mix as directed by the manufacturer. |
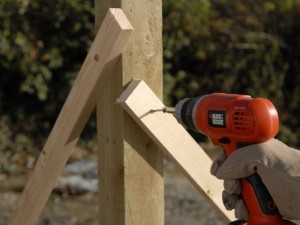 |
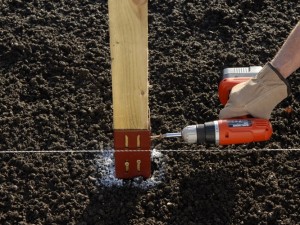
7. Screw battens to posts so that they remain securely upright while the post mix sets. Angling battens down – wedged into the ground will hold posts secure. |
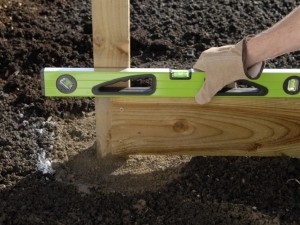 |
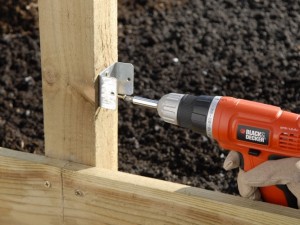
8. Screw gravel boards to the base of the posts so that the panels will not touch the ground. |
 |
9. Securely fix all panels to the fence posts with clips screwed into the top. middle and bottom of each post. |
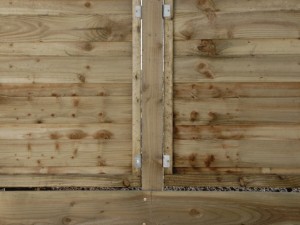 |
10. Panels simply slot into the clips, and are secured with screws. |
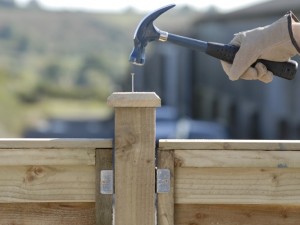 |
11. Nail a post cap to the top of each post to protect the end grain from the weather and to neatly finish the fence. |
Further fencing advice
- Check the position of underground cables and pipes before you begin to make sure you can dig holes in the places you need to along your fence line.
- Before you begin fencing it is important to be certain about the boundaries of your property.
- Under most circumstances, you can build a fence up to 2m without planning permission. In some cases, fences next to highways must not be higher than 1m. Check with your local planning office if you are unsure.
- Its always best to discuss your fencing plans with your neighbours, and ask for permission to access their property, as it is much easier to work on a fence from both sides.
- Choosing the size of your fence posts is an important factor to ensure that they are strong enough to support the size and weight of panels. A fence over 1.2m should have at least 7.5cm square wooden or concrete posts. You also need to ensure that the post length is at least 60cm higher than the fence, if you are sinking posts into the ground.
- In terms of the finished height of your posts, unless you are incredibly accurate when sinking them, it can often be best to leave final height trimming until all the posts are in place and set, panels are fixed, and you can make a judgement on how much trimming is required to give the best final appearance.
- Although the timber you are using should be treated, it is always best to take extra precautions with the sections of post that are sunk below ground level. Soaking these sections in wood preserver overnight, prior to use, will considerably extend their lives.
- Post-mix instructions for use do vary between manufacturers, so make sure you double check guidelines.
- Erecting a fence is much easier with two people (in fact pretty essential!).
- The other option for sinking posts in soft ground is to use post spikes, as shown below.
 |
 |
| a) Post spikes are simply driven into the ground using a sledgehammer and driving tool. The driving tool prevents the hammer distorting the socket section of the spike, and allows you to twist its position (by holding and twisting the bars on each side of the tool) as you progress, in order to keep it ‘square’. | b) Posts are then simply knocked into the socket and secured with screws. Using spikes does require a knack, and they are difficult to use in stoney ground as when the spike hits a rock it can send it way out of position. Some people love these though! |
 Fencing tips
- Whichever method you use to secure the post bases, take your time, keep checking and rechecking position, as there is very little tolerance for fitting panels if the posts are even slightly out of position.
- Gravel boards are not essential, but they are basically sacrificial in that they will rot, rather than the base of the panel. Therefore, you simply replace the gravel board, rather than the panel, as and when needed. So, not essential, but personally I’d always use them!
