Building a pergola
A pergola provides an attractive garden structure for supporting and growing plants. In the past, you’d have to measure and cut all the components to size yourself, but these days building a pergola is made much easier as you can simply buy one in kit form. You can build a pergola in many parts of the garden to provide an attractive focal point or to act as a screen or even build one over a patio or path to add further interest to the area. Below is an example of a typical kit pergola.
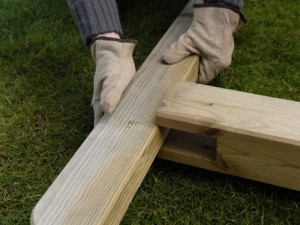 |
1. Begin to assemble the pergola on the ground. Slot one of the rafters between the notches on two of the uprights. Leave an equal overhang on each side. |
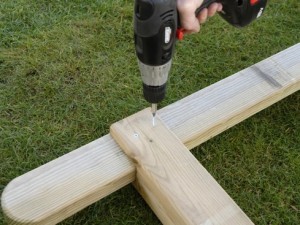 |
2. Once the rafter is in place, secure through the uprights into the rafter. 60mm screws are used in this case – fixings should be supplied with your kit. Secure from both sides. |
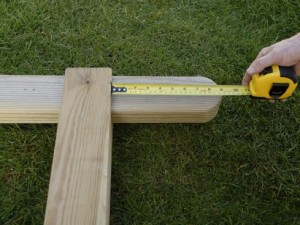 |
3. Repeat the process with the other two uprights and another rafter. Again, be sure to make an equal overhang on each side, and secure with screws. |
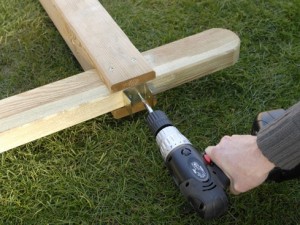 |
4 Fix U-shaped brackets to the centre of the top of each rafter where it intersects with the upright. Again, use screws supplied – in this case 25mm in length. |
 |
| 5. With a U-shaped bracket positioned centrally on top of each upright, the remaining brackets from the kit can be attached across the rafter. This kit includes 6 brackets for each rafter, but this number may vary. Here, 4 brackets are attached at equal intervals between the uprights. Do this on both sides, but lay the rafters opposite each other to ensure the brackets align and to make sure that the gap between uprights on each rafter is the same. Small adjustments are best made now, rather than when the pergola has been erected. Some kits will have notched rafters, so brackets are not used. |
 |
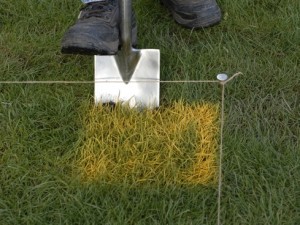
| 6. Define the position of the pergola with pins and line and space the 2 sides apart as instructed by the manufacturer, which will be dicated by the length of the rafters, allowing for the overhang on both sides. Here, the pergola will be running over this path, so positions must be marked on both sides. A large builder’s square (as shown) is helpful in measuring the layout accurately. According to how far apart your uprights are, mark positions for all 4. Use the square to ensure that you are creating as perfect a rectangle as possible with your pinned lines. Mark the positions of the uprights with a coloured aerosol spray. Be as accurate as you can, but remember you will have some room for a little final adjustment when you come to position the uprights. |
 |
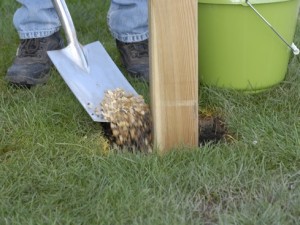
7. Dig holes for each of the 4 uprights. These should be no less than 60cm deep and 30cm square – but as always, follow any instructions given by the manufacturer (If you are securing on concrete see further ‘Things to consider’ below). |
 |
8. Pour gravel to a depth of a few centimetres into the bottom of each hole before planting the uprights of the completed section and packing some gravel around them. Yes – you are going to need some help here – this isn’t a job to be doing alone. |
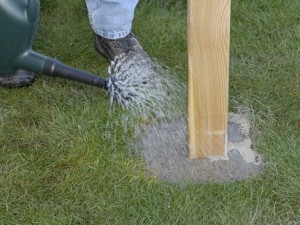 |
9. Fill the hole to the top with ready made post mix, tamp it in place and water it in following the manufacturer’s guidelines. |
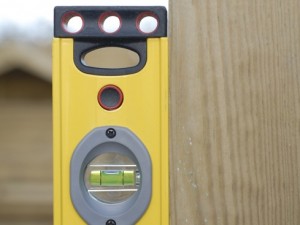 |
10. It is very important to keep checking with a long spirit level that all your posts are vertical and that the opposing sections/rafters are all at the same height to ensure a solid structure (Again see below in ‘Things to consider’ for a few more pointers). |
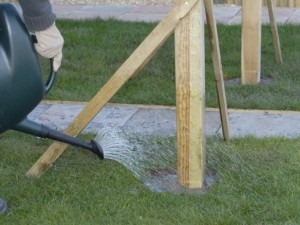 |
11. Nail wooden battens to each of the posts (as shown) so that they remain securely upright while the post mix sets. |
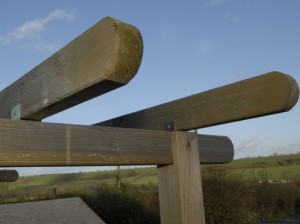 |
12. Place the remaining rafters into the U-shaped brackets with an equal overhang on each side. Secure them in place with the screws supplied – 25mm screws are used in this example. |
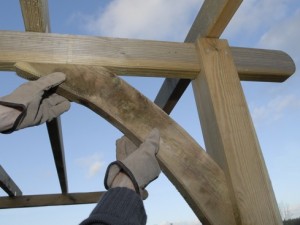 |
13. Finally position the curved braces at each corner so that they are flush with the upright whilst supporting the rafters from underneath. |
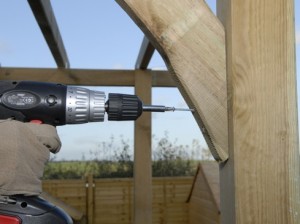 |
14. Drill pilot holes at each fixing point in order to avoid splitting the wood and then secure the curved braces with 1 or 2 screws at each end of the brace. |
Pergola tips
- The trickiest aspect of building a pergola is getting the rafters level and the uprights vertical. So it can be best to make the whole structure before you sink it into your holes. In this way you can position it, and then pack ,or dig out, under the uprights as required. Of course, this means you need 4 people to lift in place! So, time things so that you can knock on a few neighbours’ doors for a quick lift at a suitable moment. If you’re alone or there is just 2 of you, then I would recommend having plenty of batten around so that you can prop everything in place, and check levels, before you start concreting in place.
- If you use post mix – its great, but because it sets so quickly, you will need to make adjustments quickly. Therefore, there is an argument for using a standard 4:1 cement to sand mortar mix (with a bit of ballast thrown in is ideal), as then you will have more propping and adjusting time. It’s all going to boil down to the accuracy of depth in your holes, and how many pairs of hands you’ve got available.
- All the above said, with a bit of help, you can easily have this sort of pergola up in an afternoon.
- Although kits will come preserved or treated, its always a good idea to soak the posts in preservative overnight before you sink them in place.
- I’ve shown the soft ground situation here. But if you’re on a concrete surface, then you can look at using post brackets for the uprights. For more information on this see my guide ‘Erecting a fence on concrete’.

Hello Julian
I’m trying to find a source of curved braces like the ones on your “how to” – where did you buy them?
many thanks
Kate
Hi Kate,
The brackets shown were part of a pergola kit. I think you’ll struggle to find them sold separately, but there’s nothing to stop you making your own using a jigsaw to create the necessary curve.
Best,
Julian