Fixing leaking bathroom taps
To fix a leaking bathroom tap, or any tap for that matter, you must know where to turn off the water supply. First, check for isolation valves close to the tap on its supply pipes. If you cannot find one, you’ll need to turn off the supply with a stop tap further down the pipe run. The mains stopcock is often found under or close to the kitchen sink in most homes.
Tap valves
Different tap designs have different methods for actually gaining access to the valves, which is where the leak will be coming from. You can normally identify whether a tap uses rubber washers or ceramic discs (the modern equivalent to traditional rubber washers) by simply turning the tap handle. If the handle can only rotate a quarter or half turn, it will normally be a ceramic disc type tap. If it rotates more than this, it will be a rubber washer type. With both tap types, you can find many different alternatives to gaining valve access – some are shown below.
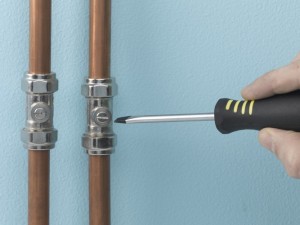 |
1. Before working on a tap, turn off the water supply. |
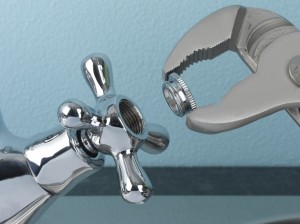 |
2. With most designs, you first need to access the tap handle screw. This is often hidden under a cap on the handle, which will be simple to unscrew. |
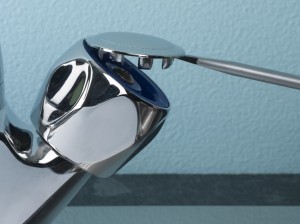 |
3. Alternatively the top cap of the tap may be flipped off using a slot-head screwdriver. Carefully push under the cap edge and ease it off. |
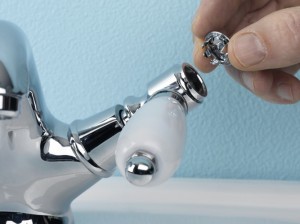 |
4. Another possibility may be to simply lift of the cap with your fingers. Tap designs therefore vary – some may need an Allen key or a small screwdriver. |
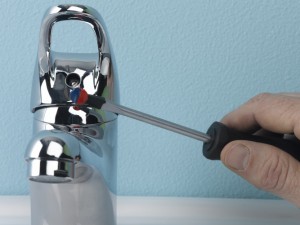 |
5. For single lever taps, it is often necessary to flip off the hot and cold indicator tab with a slot-head screwdriver to reveal a tiny retaining screw. |
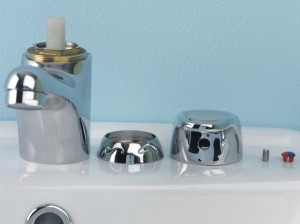 |
6. Any parts that you do remove should be laid in order for easy reassembly. This tap shows a third type of valve called a ceramic disc cartridge. This is replaced in a similar way to the ceramic disc valve replacement shown below. |
Ceramic disc valve replacement
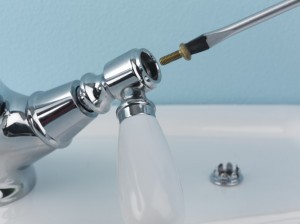 |
1. Remove the cap in the way indicated by the tap style and undo the handle screw to release the tap handle. |
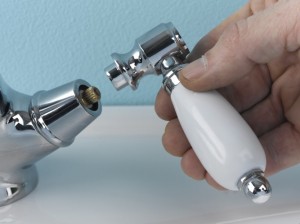 |
2. After you have removed the screw, the tap handle will lift off easily to reveal the top of the ceramic disc valve. |
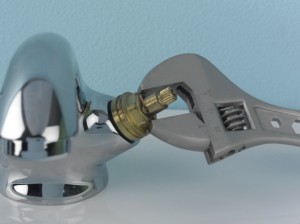 |
3. Remove the shroud (covering the valve) if there is one, and remove the ceramic valve by gripping and turning the valve with an adjustable spanner. |
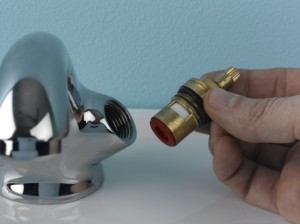 |
4. When unscrewed, remove the ceramic valve and replace with a new one, before reassembling the tap, ensuring you replace all parts in order. |
Rubber tap washer replacement
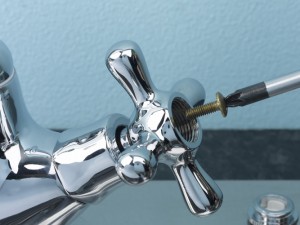 |
1. Remove the handle cap to expose the handle screw and unscrew it to remove the handle. |
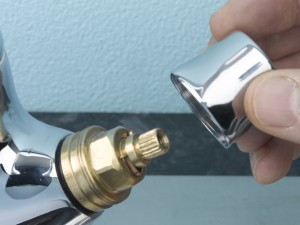 |
2. Set aside the tap handle, along with the shroud if there is one, to reveal the tap valve underneath. |
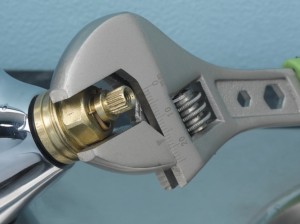 |
3. Use an adjustable spanner to unscrew the tap valve so that you can remove the valve from the tap seat. |
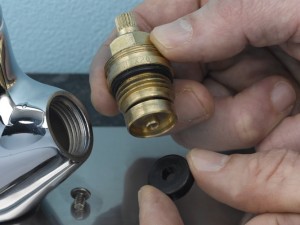 |
4. Unscrew or flip off the rubber washer and replace with a new one. Reverse the process to reassemble the tap. |
More leaking tap advice
- If you are in any doubt about the technique for fixing a leaking tap, it is best to seek professional help.
- Always put the plug in when dismantling taps as it is easy to drop small parts that may then go down the plughole.
- With single lever mixer taps, the type of ceramic cartridge is often specific to a particular manufacturer. Therefore replacements may need to be specially ordered.
- Be careful when undoing tap parts as spanners and gripping tools can easily scratch a chrome finish. Use a cloth as a buffer between the spanner jaws and the tap surface.
- Don’t overtighten when reassembling after replacing a washer or valve.
- Protect rubber washers when turning taps off and on. Most become worn and need replacing because the tap has been overtightened when turning it off. A tap with a compression valve and rubber washers will always drip once or twice when you turn it off – it is not necessary to tighten and tighten again to avoid this. Allow these residual drips without feeling the need to tighten the tap more.
